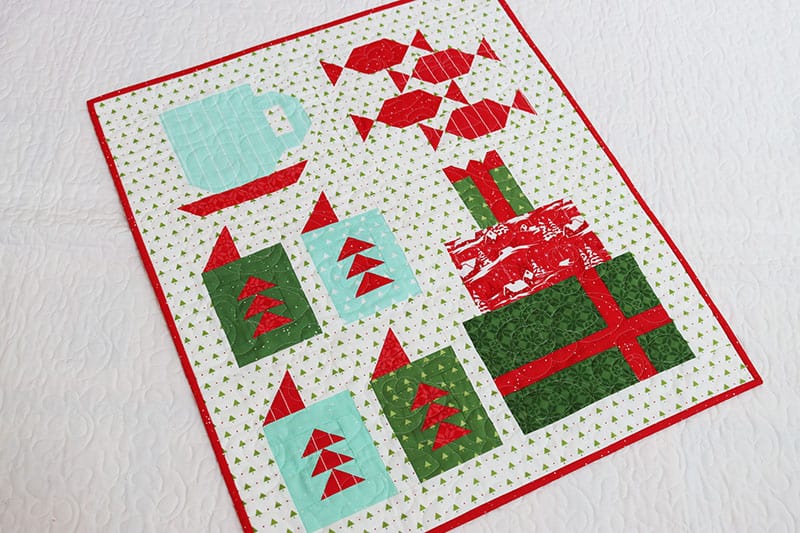
Hello, friends, and welcome to the final week for the Christmastime Mystery Quilt Finishing post. I’m excited to be able to share my finished quilt, some tips for putting it all together, and some fun ideas for your upcoming Christmas sewing.

Christmastime Mystery Quilt Finishing
It’s fun to be able to reveal this finished mystery mini! I absolutely love how mine turned out. Working with the tree fabric for a background took a little extra time but was well worth it. I love the added sparkle the trees add to the finished quilt front.

Christmastime Block & Finishing Pattern Links
- Find all of the patterns (including the Finishing pattern for this week) here (you may have to wait until 8 am CST for the pattern to be live).
- Read my Christmastime Block 1 post here.
- Find my Christmastime Block 2 details here.
- And read the Christmastime Block 3 post here.
- Find the Christmastime Block 4 post here.
- Find the fabrics I’m using for my quilt here.

Christmastime Finishing Pattern Tips
Putting this mini quilt together is actually quite easy! Just be sure to measure your sections before cutting the borders to make sure your borders are the correct size. My friend Vicki did a simple all-over flower pattern design on my quilt. I love the red sparkle fabric for the binding.
More Ideas for Christmas Sewing
If you’re like me, you want to start getting ready for the holidays now. Be sure to sign up for my 10-days of Christmas series above to get pattern ideas, inspiration, and even organizing tips and printable PDF pages for your best holiday season ever!

Thanks so much for following along on my Christmastime Mystery Quilt journey. This was sure a fun little quilt to make. Not only do I have a finished mini, but I also love that the blocks make terrific small pillows or mug rugs.
Happy quilting!

Leanne says
Such a fun and easy quilt. Thank you for sharing with us🤗
Vena T says
Sew cute! Love that directional background. It looks so good! I am often drawn to directional fabrics. I try to avoid it but sometimes it is just worth it. Thank you for sharing your mini.
julie kaplan says
what a beautiful job you did sherri….which is no surprise since all you do is just gorgeous. thank you for sharing all of your talent and inspiration.
dianne m says
love your fabrics – looks great! i wasn’t happy with my week 2 fabric choices – so, I made the cup and candy blocks into potholders and the other two blocks make nice small table toppers. will be festive for a party i’ll be hosting.
really looking forward to your/Chelsi’s Home for the Holidays sampler sew along!
Quilter Kathy says
Congratulations on a fun Christmas finish!
I’m just working on block #4 and am excited to see how my blocks look together.
Becky says
It was a challenge with using directional fabric to make sure it all went the correct direction, but I loved the challenge.
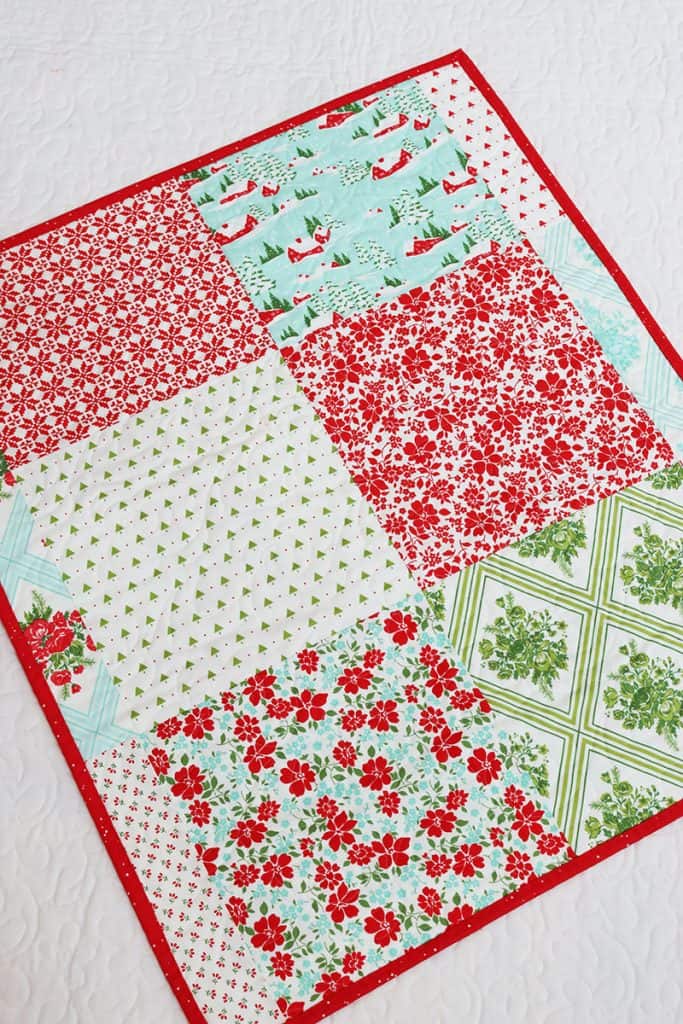
The only question I had was on the finishing directions. It showed using 16 blocks for the backside of the quilt, yet with my 10″ squares, that was way too big. Am I missing something?
sherri McConnell says
The back will be trimmed to size after quilting. If you’re quilting yourself, you might not need all 16 full-size squares 🙂