Hello, and welcome to the Virtual Quilting Bee hosted by my friend Amy of Diary of a Quilter!
If you are new to my blog please stay a while and take a look around, and thanks so much for visiting!
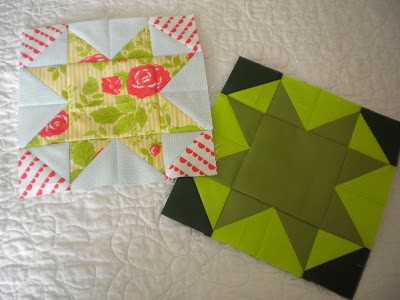
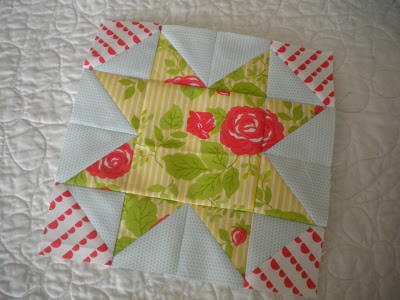
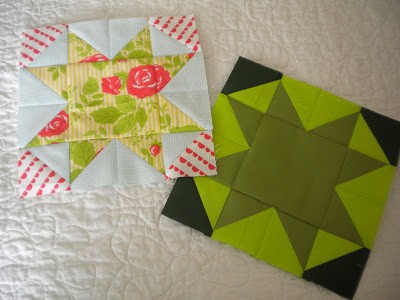
I was absolutely honored to be asked to join in the Quilting Bee and had fun creating my blocks in two color ways! The block on the left uses 3 prints from Happy Go Lucky by Bonnie & Camille for Moda, and the version on the right uses three different green shades of Kona solids by Robert Kaufman.
I always have fun with these quilt-alongs because it’s a great way to make a set of completed quilt blocks doing just a little bit at a time! Star blocks have been my favorites lately, and so I decided to make one of my favorite stars with accent colors in the corners. If you’re making a scrappy quilt, there are a lot of ways you could change this up…each star point could be made with a different fabric, and the corner accent pieces could also be made from different fabrics. The center block could also be a different fabric…there are lots of possibilities here!
For demonstration purposes, I’ll just be sharing the Kona block, since I thought the dark colors would photograph better, but the Happy Go Lucky block is constructed in exactly the same way.
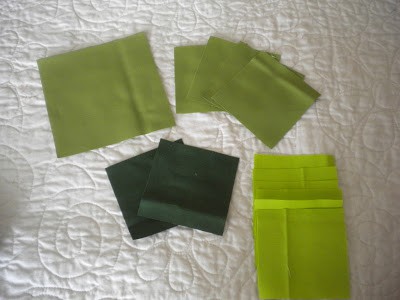
For each star block you’ll need 1 square 4 ½” x 4 ½” for the center piece, 4 squares 3” x 3” for the star points, 2 squares 3” x 3” for the accent corners, and 6 squares 3” x 3” for the “background.”
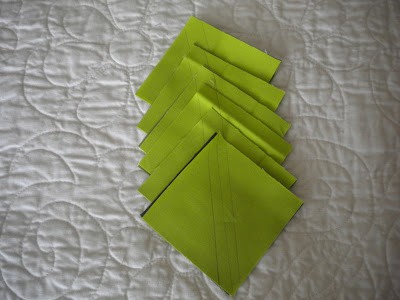
Draw a diagonal line on the back of all 6 background squares. Then, you’ll sew ¼” on either side of the drawn line. For illustration purposes, I’ve drawn the center diagonal and the two stitching lines.
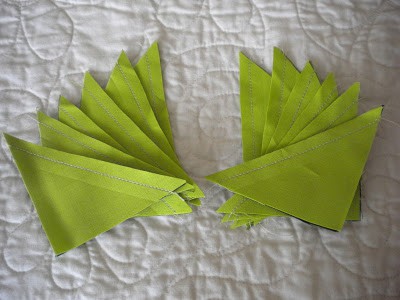
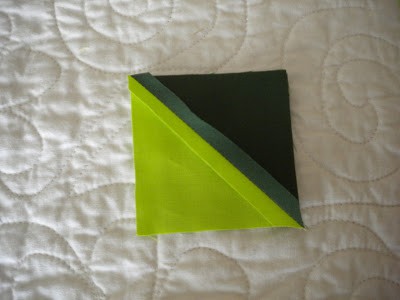
After you’ve sewn, cut each block in half on the center diagonal line. Press each seam open.
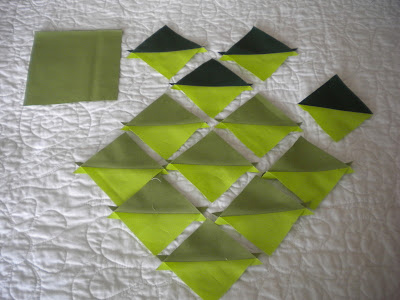
You will now have 12 half-square triangles. Next trim each half-square triangle to measure exactly 2 ½” square, and trim off the little “tails” at the corners.
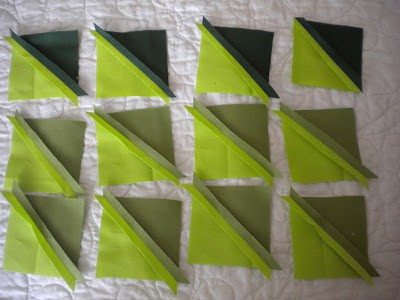
I press half-square triangles open, especially when there are a lot of half-square triangles in one quilt block.
The back of your half-square triangles should look like this.
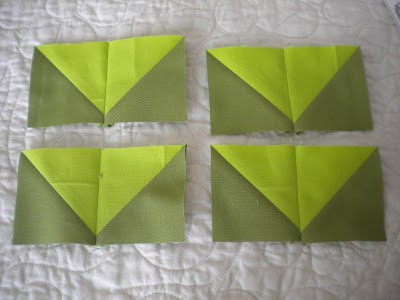
Make 4 sets as shown above. Use a ¼” seam when stitching, and press the seams open.
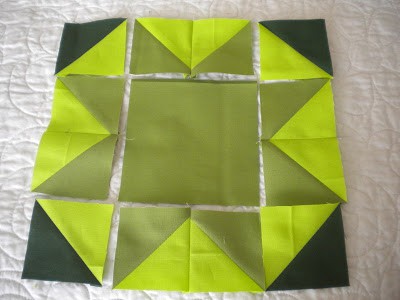
Now you are ready to lay out the pieces of your block.
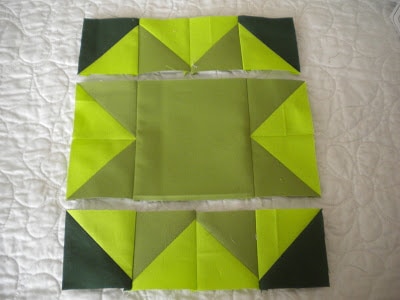
Sew the pieces together in rows using ¼” seams. For the top and bottom rows, press toward the accent corners. For the center section, press toward the center square. Your block will measure 8 ½” x 8 ½” at this time, giving you an 8” finished block.
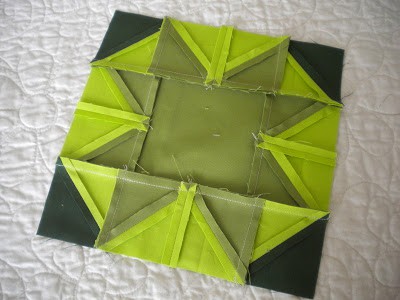
The back of the block…
I hope you have fun creating your block using this tutorial. I can’t wait to see what the next block will be!
Thanks so much for stopping by!



trish says
Beautiful blocks Sherri! That Happy Go Lucky makes me smile every time I see it.
I am heading in to make mine now. Thanks for the fabulous tutorial! This quilt is going to be so much fun to make!! :o)
Bev says
So the finished block is 8", right? Also, how many of them do we make? Thanks for doing this! I love these things and have already put your button on my blog. I'll blog about it tomorrow.
Cheery wave from Bev
belarmina says
me gusta!!!!!
saludos
Kath says
I love your tutorials Sherri, they make everything look so easy!
Live a Colorful Life says
such pretty blocks–it's always so fun to see the same thing made up in prints and solids.
gailss says
Very nice blocks Sherri and you make it very easy for those who need a bit of explaining.
Thanks, Gail
Carrie P. says
so pretty. the green one is really fun.
DoohikeyDesign says
Super gorgeous! You amaze me!!!
Katy says
I love the star blocks too! Thanks for the tut!
Rosa says
Pretty nice!
Three Sisterz says
Thanks for a great tutorial!
Can't wait to get started!
~Courtenay
Lisa in Port Hope says
Thank you for showing the back, it was very helpful!
Lisa in Port Hope says
I used the no-waste flying geese instead of HSTs. One 5-1/4" square (background) and four 2-7/8" squares.
http://www.flickr.com/photos/82152150@N07/8540201417/in/photostream
Thimbleanna says
Very pretty Sherri! The star block has always been one of my favorites!!!
OPQuilt says
This was great. My friend Rhonda (East Coast quilter) and I were talking about how fun it would be to try and do two blocks–one trad and one modern, and then I found this blog post! I sent the link right over to her. Amazing–and PS, I love your white quilt background for the photos.
E.
Claire says
I learned a new to me way of piecing triangles into squares from your tutorial, thank you!
SewBlinkey.blogspot.com says
Hi, you are correct that the block should measure 8 Inches? It seems I cut alot off from 8.5 inches. Thank you.
Judith says
Why do you press the seams open rather than to one side? Does it have to do with number of seams in block or size of block or something else? THanks
Kathy says
Got my bundle from Pink Castle.. Having trouble with the solid colors… What are the corner pieces? They look like a forest green but the closest I have in this bundle is a dark teal. Could you please give the names of the colors used and maybe I can match it up that way. Thanks so much!
Stephie says
I just decided to play catch up with the Virtual Quilting Bee and made your block today. Would just like to say thank you for a fun couple of hours playing!!! HST practice, just what I needed! Great block/tutorial 🙂
Micheline Trottier says
Would like to see the finished top from these blocks!
Micheline Trottier says
Would like to see the finished tops with these blocks.
Miss Bee says
Hi Sherri, I just found this site and I have made your block. The instructions were some of the best I have read, clear and concise. My co-worker who is a non sewer and a non quilter saw your block and decided to try it after reading your instructions. We have decided to join the virtual quilting bee because of your block. I look forward to additional blocks from you. Thank you for inspiring us.
Cherrell says
I recently found your blog by searching for quilting tips. Your instruction as to how to make the blocks that are 2 triangles together REALLY MADE MY DAY! I am a new quilter and have been stuck with crazy quilting only as I could NOT make points to match up until I found your blog. THANK YOU for your time helping those of us who are (were) quilting challenged. 😉
missjubilee says
Hi there! I watched as the quilting bee happened a while back but without participating because I was busy preparing to move back to the US, finishing my masters online, etc. Before moving back, I went to the fabric market for some local dark-blue-and-white prints and some other cottons that would coordinate, hoping to make this one day. I ended up cutting up a few shirts and a skirt as well when I left, that hadn't sold in the clearing out but I didn't want to keep – so exciting that the quilt will have bits of my past as well as memories of China in the fabrics! Anyway, I've cut pieces for 2 of these squares, and I wanted to suggest a small addition to the directions here:
"Draw a diagonal line on the back of all 6 background squares. Then, you'll sew 1/4'' on either side of the drawn line. For illustration purposes, I've drawn the center diagonal and the two stitching lines."
It took me a lot of scrolling up and down to look at pictures of the steps to realize that you had put the background squares each ON TOP OF one of the OTHER 3×3" squares. I thought I was supposed to sew the background squares to each other at first. You stacked them so neatly when you drew the lines that it's really hard to see that they're stacked with the non-background squares. Maybe you could add words about pairing them up with the non-background squares (too late for a photo, right?), so other new quilters aren't confused.
Thanks for sharing this block, I'm so excited to slowly, slowly put together a quilt over the coming months!