

Welcome to my stop for the Sew Red for Women Block of the Month! I was honored to be asked to share a block for this group! This block of the month has been going since the beginning of the year (my block is block 11), and there are some wonderful blocks! I think you’ll want to make them all if you haven’t already joined in! You can find previous block links on the Sew Red for Women blog.
My block uses ¼ yard of background and ⅛ yard each of four contrasting prints or solids ( I used two prints and two solids).
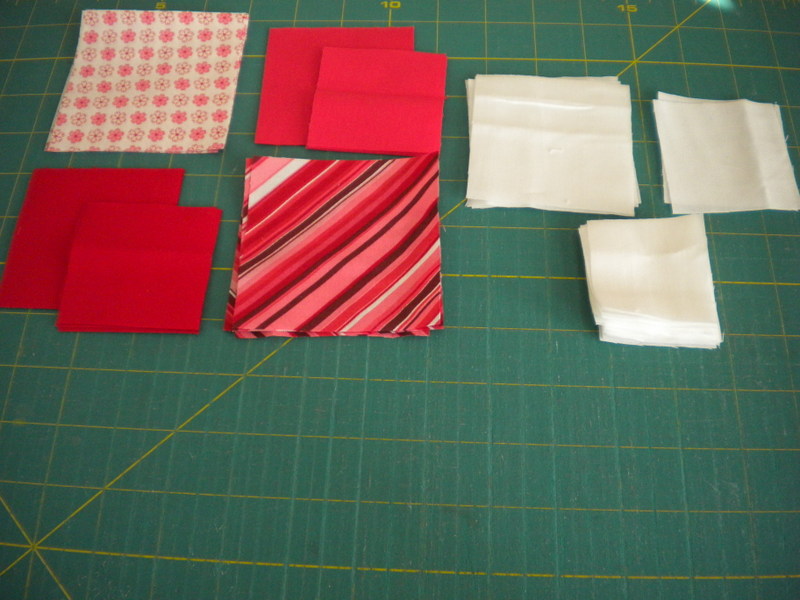
Using two of your ⅛ yard pieces cut 4 squares 3 ½″ x 3 ½″ from each. From each of the other two ⅛ yard pieces cut 4 squares 2 ½″ x 2 ½″ and 2 squares 3″ x 3″.
From your background cut 16 pieces 2″ x 2″, 2 squares 2 ½″ x 2 ½″, and 4 squares 3″ x 3″.

For each “O” block use 2 colored 3″ x 3″ squares, 4 colored 2 ½″ x 2 ½″ squares, 2 background 3″ x 3″ squares and 1 background 2 ½″ x 2 ½″ square.

For each “X” block use 4 colored 3 ½″ x 3 ½″ squares and 8 background 2″ x 2″ squares.

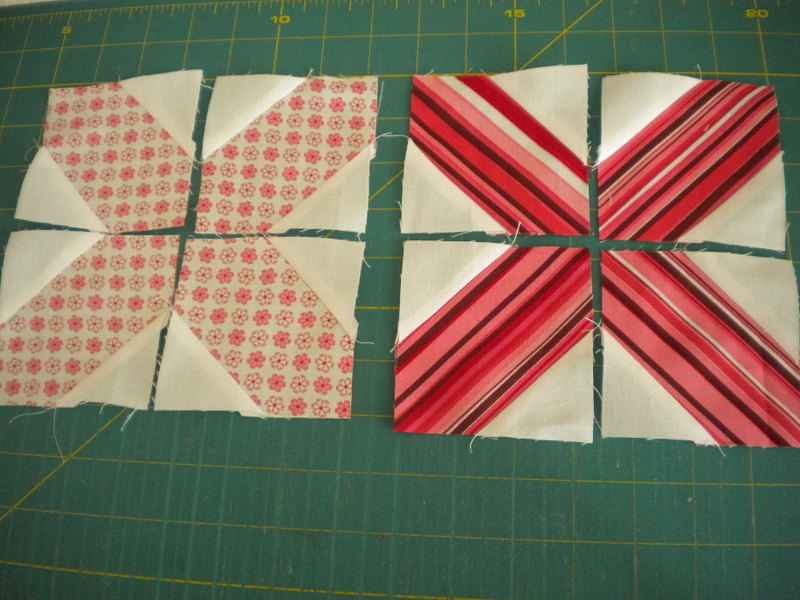
First we’ll make the “X” block portions of our block. Draw a diagonal line across the wrong side of all 2″ x 2″ background squares. Sew just inside the line to make corner square triangles. For layout of the background pieces see photo above.

Be sure to sew just inside the drawn lines (just a bit closer to the corners).

After sewing, trim corners ¼″ away from stitching.
Press towards background triangles.

Sew pieces together to make two “X” blocks. Each “X” block should measure 6 ½″ x 6 ½″.
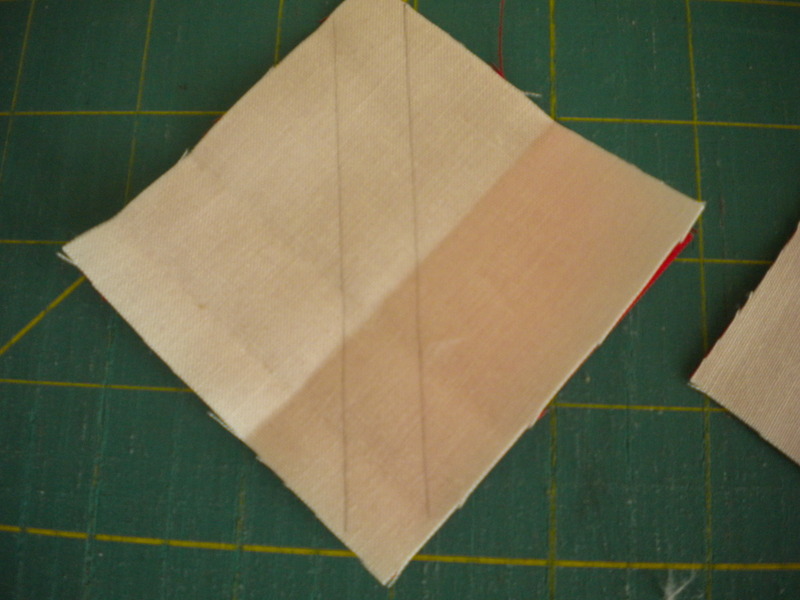
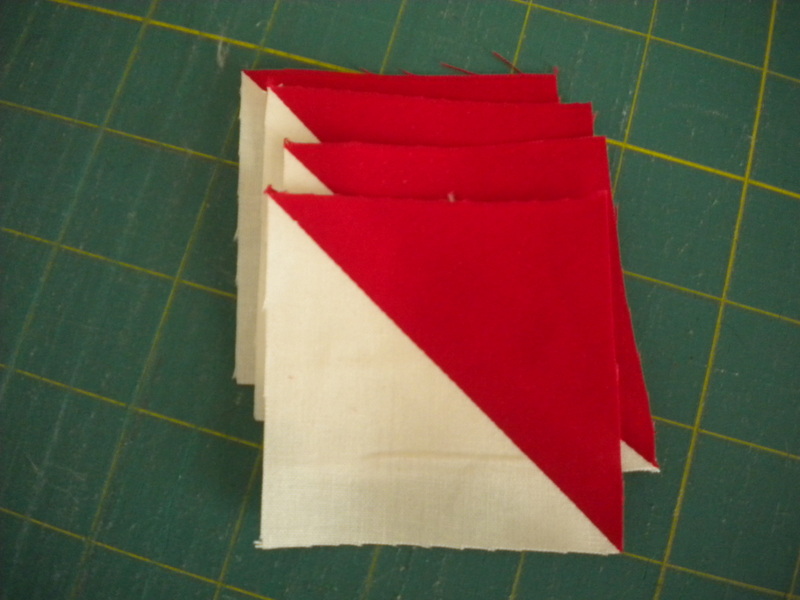
Now we’ll make the “O” blocks. On the back of each 3 ½″ x 3 ½″ background square draw two lines each ¼″ away from the diagonal. I do this by centering a ½″ ruler on the diagonal. If you don’t have a ½″ ruler you can draw a diagonal line as you did for the previous blocks, then stitch ¼″ away on either side of the line.
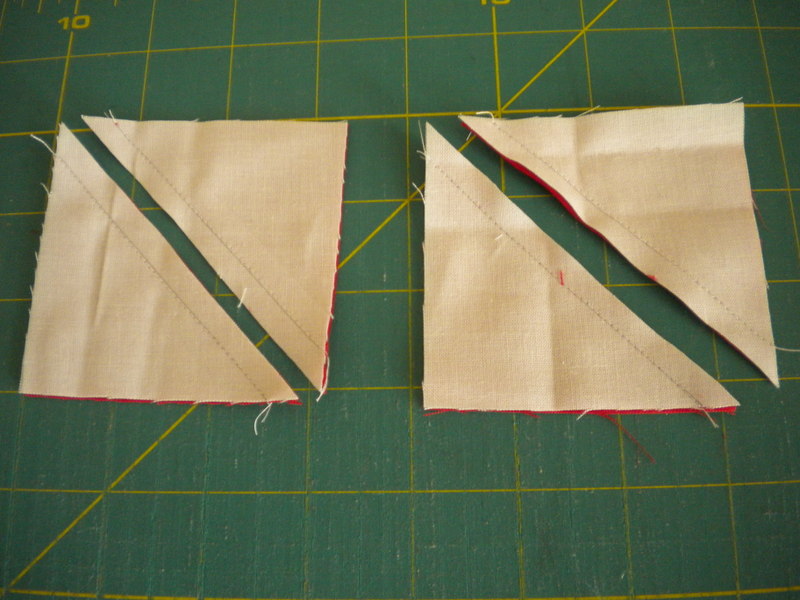
After stitching you will cut these pieces on the diagonal.
Open the blocks and press (I like to press my half-square triangles open). Trim, if necessary, to make sure your half-square triangles measure 2 ½″ x 2 ½″.
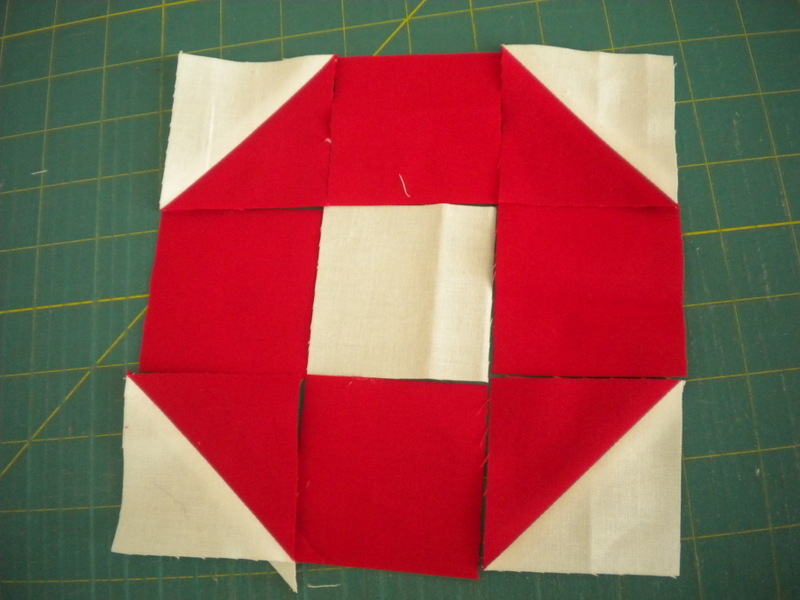
Next, arrange your 4 half-square triangles along with the 4 colored 2 ½″ x 2 ½″ squares and the background 2 ½″ x 2 ½″ square as shown above.
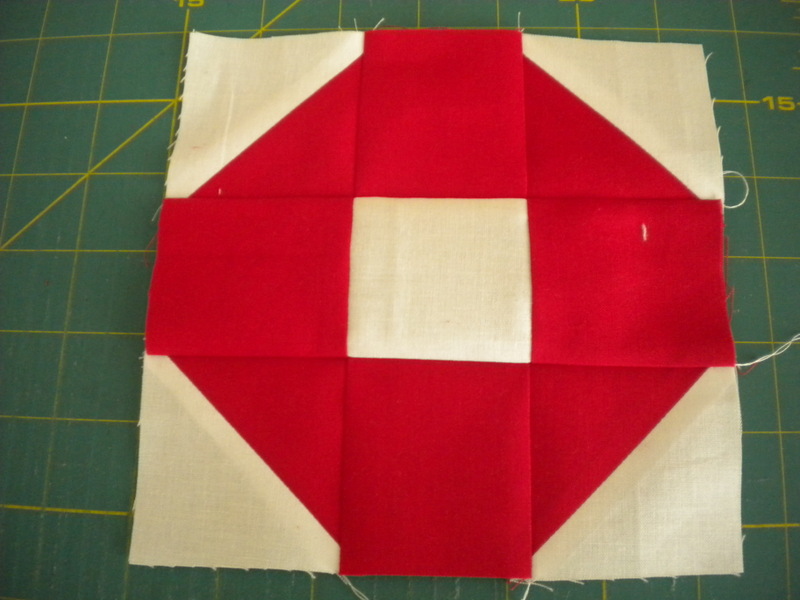
Sew pieces together to make your “O” block. Make two. Each “O” block should measure 6 ½″ x 6 ½″.

Arrange the “X” and “O” blocks as pictured.
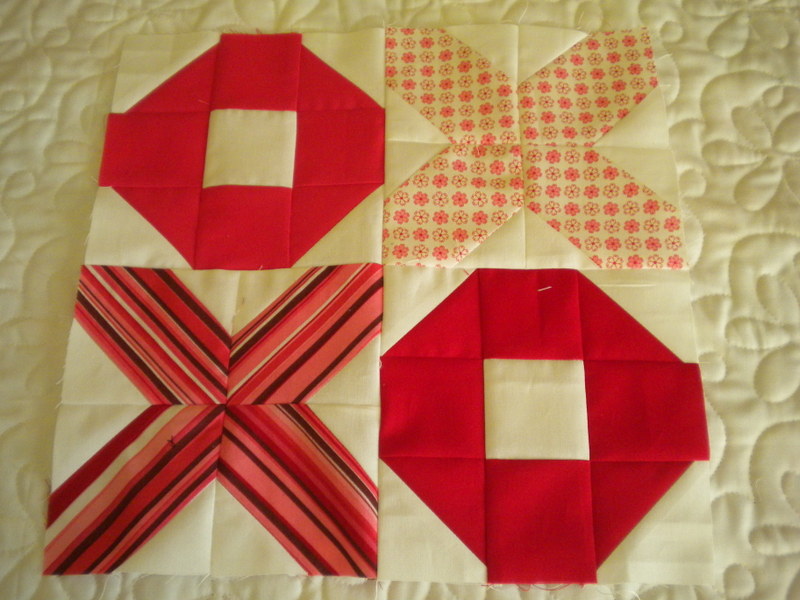
Sew the 4 block sections together!
I hope you enjoyed this block tutorial…thanks so much for stopping by!

Carol says
What a cute block Sherri! LOVE it!
Lisa says
Pretty block, thanks for the tutorial 🙂
Chris says
Love your block! It is so cute and creative! I have been doing the Sew Red for Women blocks and could hardly wait to see yours. 🙂 Thanks for the great block, it is one of my favorties!!!
Lesley says
Lovely blocks! Will have to check this program out. Thanks for sharing!
Thimbleanna says
Very, very cute Sherri!
Nanette Merrill says
super cute, love the idea and the fabrics are perfect
Sara says
Very pretty and I love the color especially. I made an X's & O's baby quilt recently, but the O's were made with the same pieces as the X's – only turned differently. I like your O block even better.
Missouri Gal says
Love it!
SewBlinkey.blogspot.com says
You are such a fantastic quilter Sherri. I love these blocks. Thank you for taking part and sharing.
Bari Jo says
This is so cute – I love the Valentine's Day feel to it! And the way you used the stripe in the 'x' block! :O)
Anita says
Love the x and o's! too cute 🙂
Natasha says
Its amazing, I used to have a pattern for these blocks….lost in the abyss. I click over here and you have a tutorial. All the better, thank you!
Mama Pea says
Great tutorial. Love the blocks!