
Hello! Happy Wednesday and happy last day of August! I dropped off my fall quilt to be quilted yesterday, and I just wasn’t ready to stop sewing with the fabrics from that quilt. So…I gathered up some of the scraps and started working on some new fall place mats for our table.

I hope you’ll enjoy this tutorial I’ve prepared for these fun place mats–I’ve got
a few more of them still to make for our fall table!
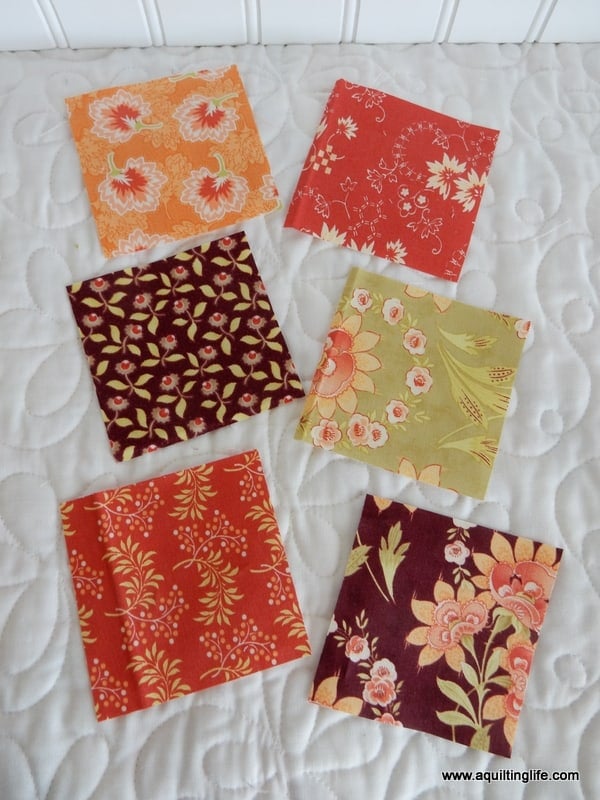
First you’ll need to gather your fabrics. One charm pack will actually make all nine of the interior blocks (squares and Maple leaves) for four placemats–you’ll just need extra fabric for the strip pieces, scrappy binding, and backing.
For 4 Place Mats (Each place mat measures 12 ½″ x 15 ½″)
- 1 charm pack (or at least 9 charm squares per place mat)
- scraps for stems (or one charm square)
- ⅛ yard background (or a variety of scraps)
- At least 7 strips 2 ½″ x WOF (width of fabric) for strip pieces
- ½ yard for binding (or scraps for a scrappy binding)
- 1 yard of fabric for place mat backs
- 4 pieces of batting 18″ x 20″
Make the Maple Leaf Blocks:
For each Maple leaf block you will need the following (use one fabric and a background for blocks like mine, or you can mix and match for scrappy Maple leaves):
- 2 matching print squares 2″ x 2″
- 3 matching print squares 1 ½″ x 1 ½″
- 2 background squares 2″ x 2″
- 1 background square 1 ½″ x 1 ½″
- 2 background squares 1 ¼″ x 1 ¼″
- 1 stem fabric square 1 ½″ x 1 ½″
Draw a diagonal line on the wrong side of the 2″ x 2″ background squares and the 1 ¼″ x 1 ¼″ background squares.
Make 4 half-square triangles for each Maple leaf block by placing a print
square 2″ x 2″ right sides together with a background square 2″ x 2″.
Sew ¼″ from both sides of drawn line and cut on drawn line to make 2
half-square triangles. Trim each hst to measure 1 ½″ x 1 ½″. For more information on making half-square triangles see this post.
Make the stem section of the Maple Leaf block by using the easy corner triangle method: place a 1 ¼″ x 1 ¼″ background square right sides together with a 1 ½″ x 1 ½″ stem fabric square. The background square will be a little smaller than the stem fabric square. Sew on the drawn line and press the background square out. Trim the extra background and stem fabric. Repeat on the opposite corner. (See this tutorial if you need more visual help for this part of the block).
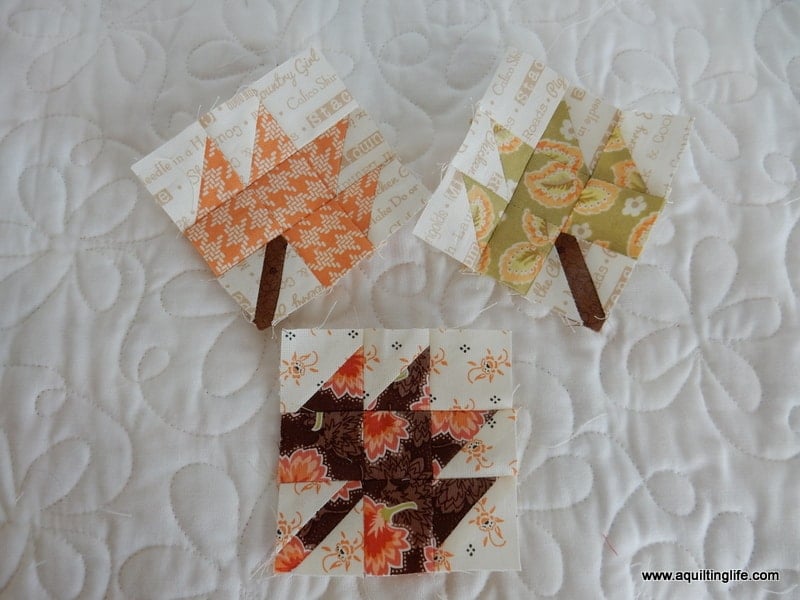
Assemble the 4 half-square triangles, stem section, background square 1 ½″ x 1 ½″, and 3 print squares 1 ½″ x 1 ½″ to make the Maple Leaf block as shown below. The Maple leaf blocks will be 3 ½″ x 3 ½″ unfinished. Make 3 Maple leaf blocks for each place mat.

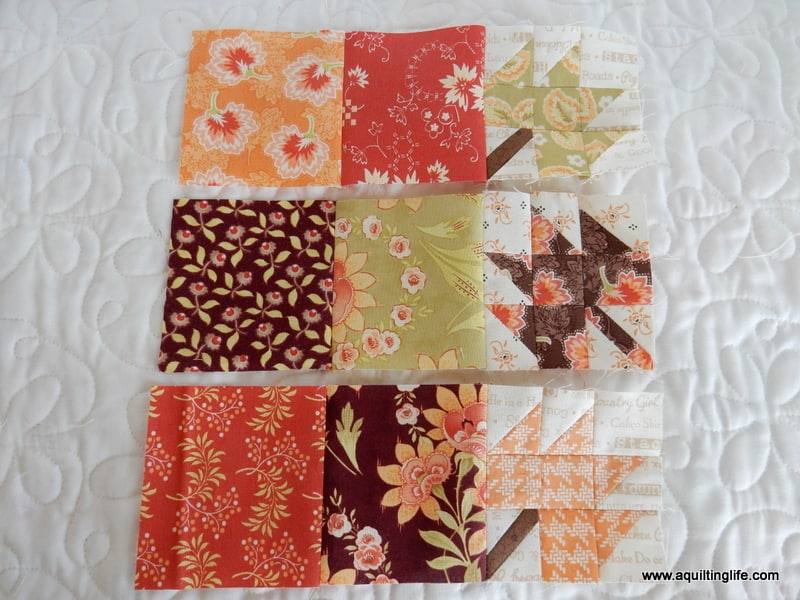
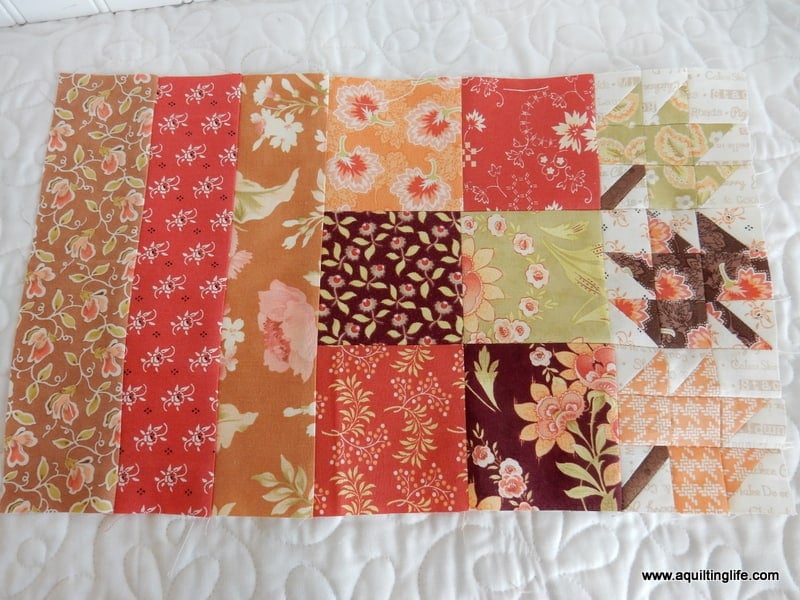
Next you’ll need to choose 6 of your charm squares and cut them into 3 ½″ x 3 ½″ squares.
Assemble the six squares 3 ½″ x 3 ½″ and the three Maple leaf blocks as shown. Sew together into rows, then sew the rows together.
I pressed all of my seams open.
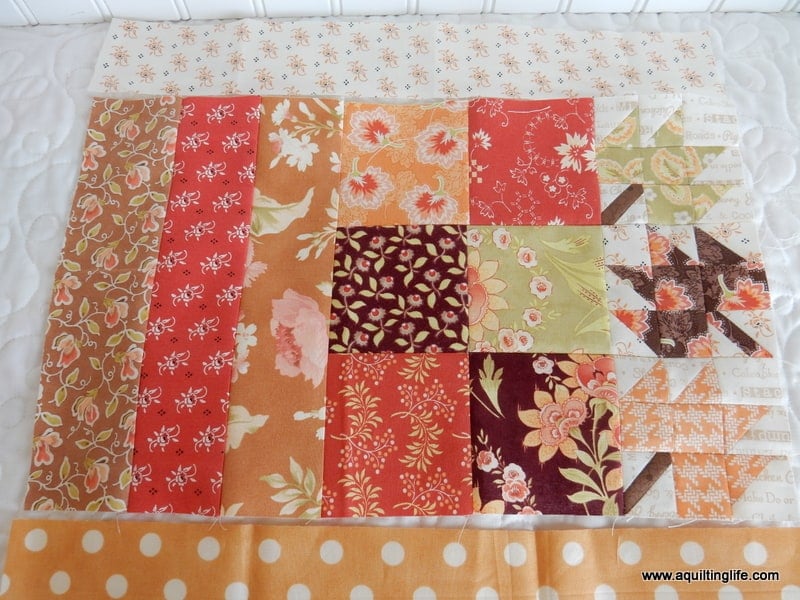
Trim 3 of your 2 ½″ strips to measure 2 ½″ x 9 ½″.
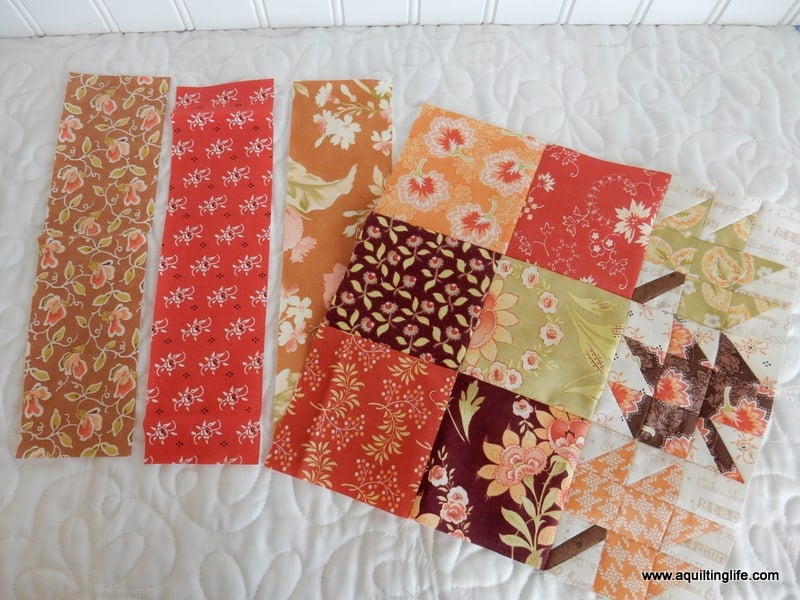
Sew the 2 ½″ x 9 ½″ strips to the square/Maple leaf unit as shown.
From the 2 ½″ strips, trim two pieces to measure 2″ x 15 ½″. Sew these to the top and bottom of the place mat.
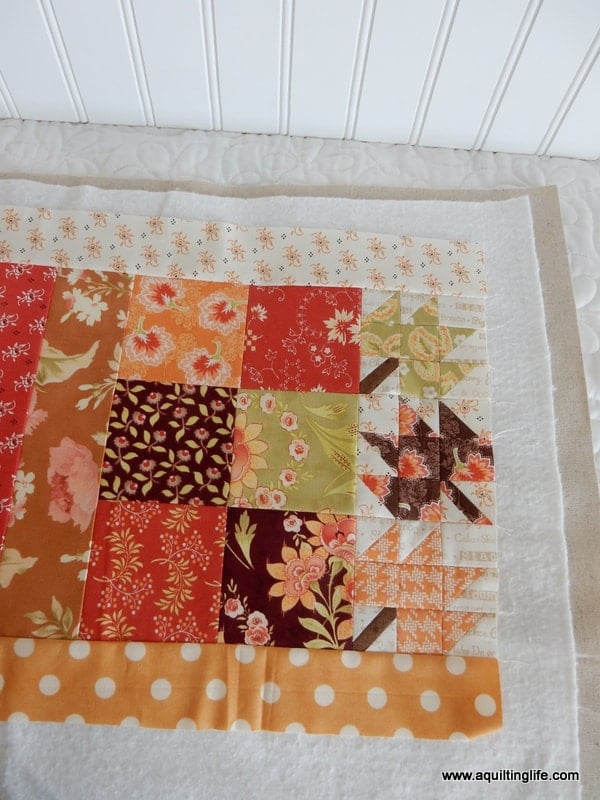
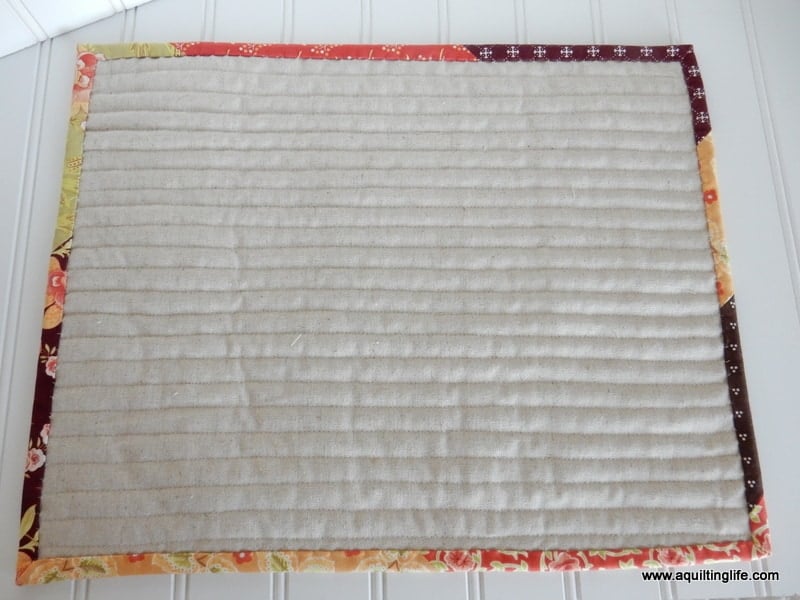
Now it’s time to layer the place mat top, batting, and backing for quilting. I used Moda Mochi Linen in Natural for my place mat backing. It is a beautiful sturdy linen which will wear well through repeated washings.
I used simple straight line quilting with lines spaced just about ½″ apart. I lengthened my stitch to 3.5 and used a walking foot.
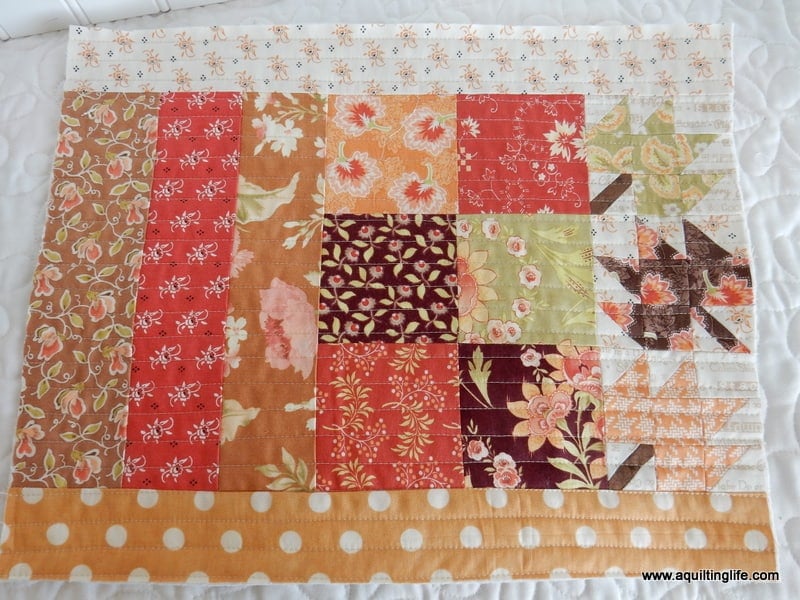
Bind as desired. I used a scrappy binding because I had already pieced it for my Fall quilt and made a little extra. (For a tutorial on scrappy binding see this post).
That’s it…be ready to make a few…they are a lot of fun…and those adorable little Maple leaves just add an extra layer of cute!

Thanks so much for stopping by! Happy Quilting!

Brita says
Sweet placemats. Thank you for writing such a wonderful blog, it's pretty, informative, and always makes me smile. You come across as a sweet lady, someone I'd like as a friend. Thanks!
Little Quiltsong says
These are so cute. Love the little maple leaf blocks on the side! Thank you for this tutorial.
martha says
THOSE BIG ADS ARE SO DISTRACTING.
Michele says
What a cute, fun fall project! I love the little leaves! Thanks so much for the tutorial 🙂
Susan says
Super idea. I know the feeling of not wanting to put the fabric away after finishing a bigger project. Especially if the big project is going to live elsewhere. It's nice to have a reminder for yourself. I see a weekend project coming up.
Terry Johnson says
Thanks for the fall inspiration. Very cute placemats.
Hildy says
Tahnks for this great tutorial that's so cute! Love the leaves and the scrappy binding is perfect:-)
Brenda says
Sherri,these are great. I love the maple leaves!
Janet says
This is a great project . Thanks so much for the tutorial.:)
mascanlon says
Thank you for the tutorial. Surely in all this stash I have a charm pack that says Fall!
Brenda says
My Daughter is getting married in October and in September is her Bridal Shower. I asked what she really wanted and what colors she was doing her house rooms in. She said right now she just wanted all Fall colors. Your place mat tutorial is fabulous and will be perfect for the place mats I am going to make today! Have a fantastic creative day!
OPQuilt says
So cute, and I love the idea of fall maple leaves on a fall project. As usual, your explanations are very clear–maybe I'll take this with me to a retreat I've got coming up! (I refer many people to your Preparing for a Retreat Post, by the way.)
🙂 Elizabeth
Lara B. says
That's sew sweet Sherri! Those fabrics are just perfect too.
Rosemary B❤️ says
These are sweet Sherri, I am going to make two for my mom and dad.
I have a lot of scraps that will work
thank you for sharing
Whichcrafts says
Thank you so much for the tutorial. Love the place mats!
Lucy says
Thank you for the tutorial so easy to follow your instructions. I love to make place mats and these are darling.
Dondi Murdock says
Thank you for ALL your blogs. It wouldn't be a day without reading your blog. I get so many great ideas from you. I really appreciate how positive you always are. I am almost at the point where you are: always having something ready to sew. Almost. I agree that it is much easier to sew if something is ready to go.
KMSC says
Thanks, Sherri, for this tutorial. Love these placemats! Now, where are my Fall fabric scraps?
OneCreativeFamily says
Sherri, the placemats are great. Thank you for the tutorial.
Jackie
Needled Mom says
I love the little leaves. Thank you for the tutorial.
Julie Cefalu says
This is so cute! Thank you for sharing the tutorial. I love the scrapiness of it! Julie@TheCraftyQuilter.com
Linda Janovitz says
Hi Sherri,
Thank you for the great tutorial ! I am a leave person – I have a stash of leave fabric, crazy ! The placemats are really cute. I may make them with ALL leaves.
Blessings to YOU !!
maryf says
sweet way of showing love and value towards your home. definitely colorful and charming, however i am looking for slate table mats as well, for decent look.