
Hello and happy Friday! I hope you’ve had a wonderful week and that your weekend is off to a terrific start. Today I’m beginning my Christmas in July project series with a two-part Christmas table runner tutorial! I had a lot of fun making this fun table runner a couple of weeks ago! And I thought it would be easier for everyone if I broke the tutorial into two parts. This week we will make the star blocks, and I’ll post finishing instructions next week. (I’ll include all of the materials you need to complete the runner in today’s post).
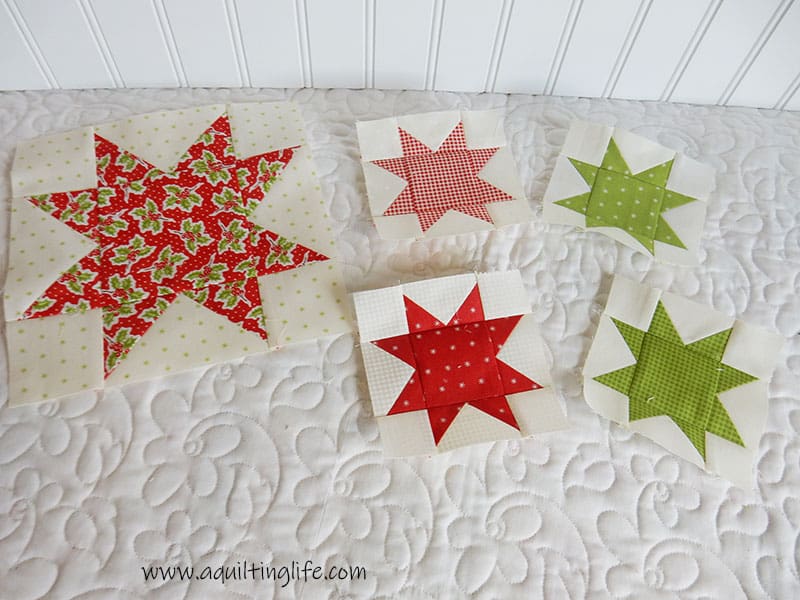 This week we will be making 5 star blocks: one large blocks and four small blocks. You might remember that I shared a sneak peek of these flying geese units a couple of weeks ago. I did use the Bloc Loc flying geese rulers to trim my blocks (finished size for the large block is 2″ x 4″ and finished size for the small block is 1″ x 2″). However, if you use the Bloc Loc rulers to cut the pieces for your flying geese units be sure to follow the ruler instructions and adjust fabric measurements accordingly. My tutorial cutting measurements are for the standard method of making flying geese blocks.
 Christmas Table Runner Materials:
 Christmas Table Runner Materials:
For Large Star (Make 1):
- 1 print square 4 ½″ x 4 ½″
- 8 print squares 2 ½″ x 2 ½″
- 4 background rectangles 2 ½″ x 4 ½″
- 4 background squares 2 ½″ x 2 ½″
For Small Star (Make 4):
- 1 print square 2 ½″ x 2 ½″
- 8 print squares 1 ½″ x 1 ½″
- 4 background rectangles 1 ½″ x 2 ½″
- 4 background squares 1 ½″ x 1 ½″
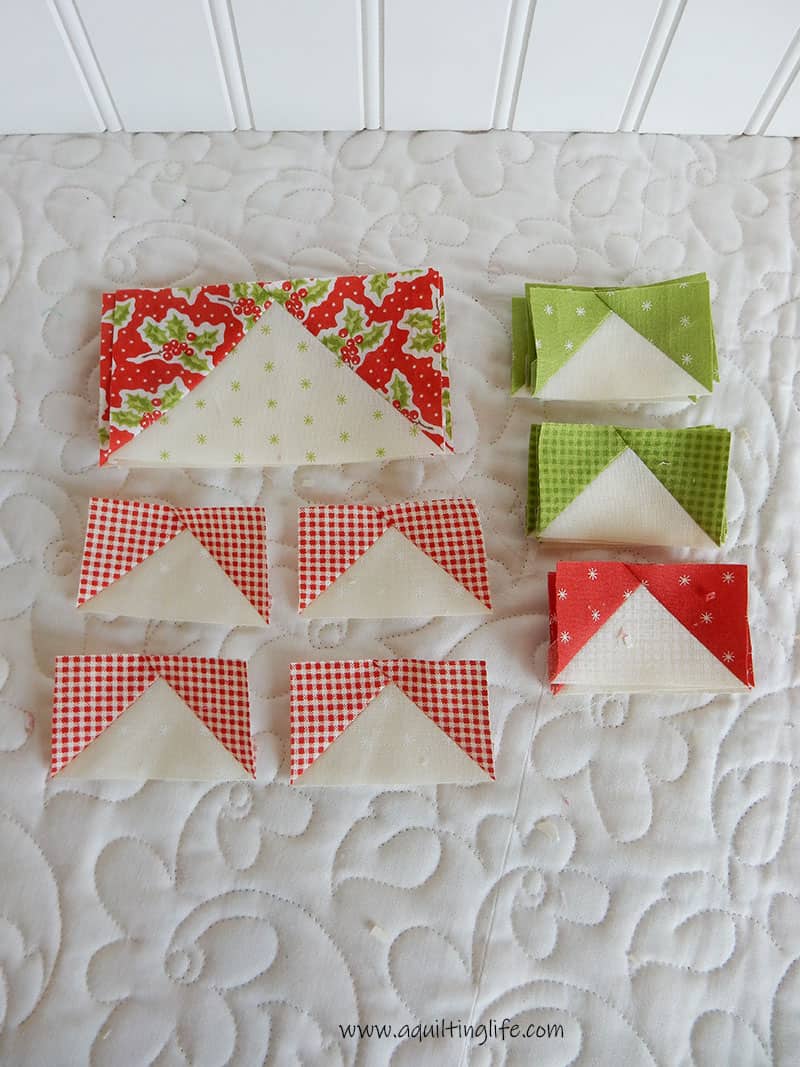
Make the Flying Geese Units
- Draw a diagonal line on the wrong side of all of the 2 ½″ x 2 ½″ print squares for the large star block and on the wrong side of all of the 1 ½″ x 1 ½″ print squares for the small star blocks.
- Place a print square right sides together with a background rectangle and stitch on the drawn line. Press out. Trim the seam allowance to measure ¼″.
- Repeat on the opposite side of the background rectangle. For pictures of these steps see this post.
- Make four flying geese units for each block.
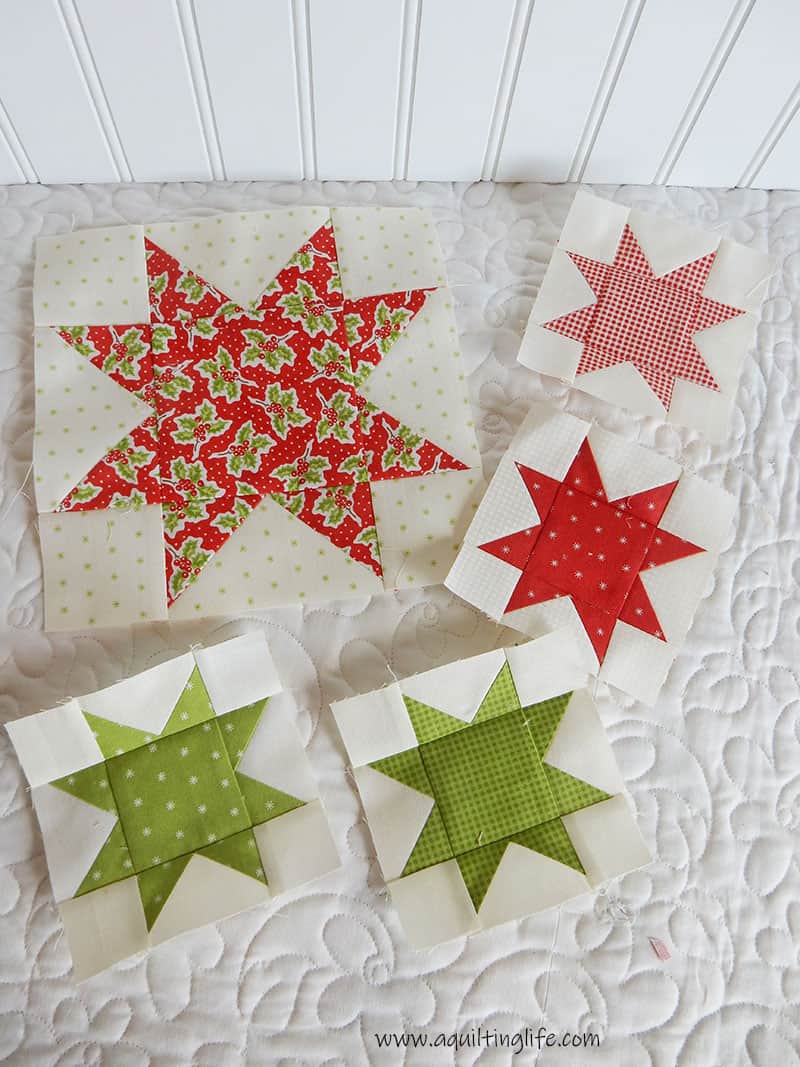
Assemble the Star Blocks
- Using the print center square, the four flying geese units, and the four background squares, lay out the star block. Make sure all of the flying geese units are turned the right way.
- Sew the pieces in the top, middle and bottom rows together using a ¼″ seam allowance.
- Sew the rows together using a ¼″ seam allowance. Press. Make one large block and four small blocks.
- The large star block will measure 8 ½″ x 8 ½″ and the small star blocks will measure 4 ½″ x 4 ½″.
Next week I’ll share how we’re going to put it all together! Here are the additional fabrics you’ll need for next week:
Christmas Table Runner Tutorial Finishing Materials:
- 4 background squares 4 ½″ x 4 ½″ (I used the same background I used in the large star for this)
- 2 sashing rectangles 1 ½″ x 8 ½″ (I used a medium/light print that contrasted with all of my blocks and backgrounds)
- ⅛-yard inner border (I used another medium print that contrasted with all of my blocks and backgrounds)
- ¼-yard outer border (I used the same fabric I used for my large star)
- ¼-yard binding (I’m going to use a coordinating green print)
- ⅝-yard backing
- Batting at least 20″ x 38″
 Have fun picking out your fabrics and making the star blocks this week! I’ll show you how to put it all together next Friday! Oh, and I’ve linked the Bloc Loc rulers below (affiliate links).
Christmas Table Runner Supplies
Happy quilting…and thanks so much for stopping by!
Christi Broshar says
This is going to be awesome! Can’t wait to see the finished product!
Hildy says
Love yoour cute Christmas stars and thanks for the tutorial:-)
Robin L. Davis says
Hi Sherri, This looks like a lot of fun and doable. Ty
Janice says
Thank you. I recently made your Potluck pattern with Bonnie and Camille’s Vintage Christmas fabric. I was planning to make a table runner with the leftovers. This looks like just the ticket. I can’t wait to see the rest of it.
Gale says
Jumped right in and made the stars. Looking forward to next week’s tutorial. Awesome tutorial.
Judy Blinkenberg says
Oh I love your blog. I think about you every time we go through Las Vegas, and your town. These 8 1/2 would be so cute in the Block Heads ll sampler, the 24” block. Just wish so had more fabric.
Sherri says
That is a good idea! After seeing so many people who did that I’m thinking about taking mine apart and adding a center block!