I’ve been working on some quilt market sewing, but for the rest of the week I’m going to work on some of my works in progress –can’t wait! Since I was making a lot of flying geese yesterday, I thought it might be a good time to share some tips for piecing these blocks.
These tips and techniques work for flying geese, for half square triangles, and for “easy corner,” “folded,” or “flipped” corner blocks.
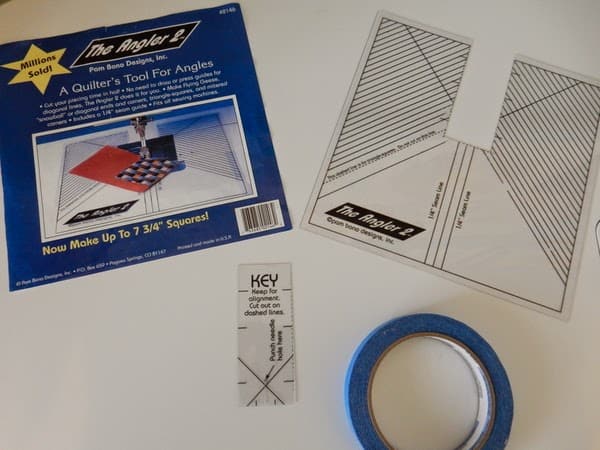
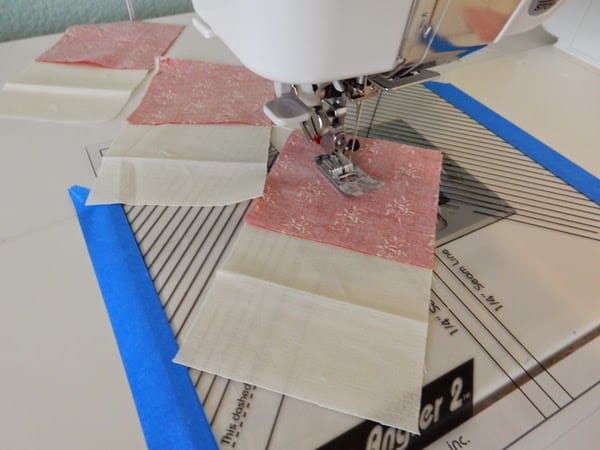
Whenever I need to make a lot of any of these types of blocks I use my “Angler” tool (designed by Pam Bono). A lot of times directions for these blocks will call for diagonal lines to be drawn on the wrong side of lots of squares. Using the Angler enables you to make the blocks quickly and accurately without drawing any lines. I keep painters tape with my Angler to use to attach the template to my machine. If you’ve purchased a new Angler and are using it for the first time you will need to first cut the key section from the template. Using an Exacto knife or very sharp scissors will help you accurately cut out this piece (this step is only done the first time you use the tool).
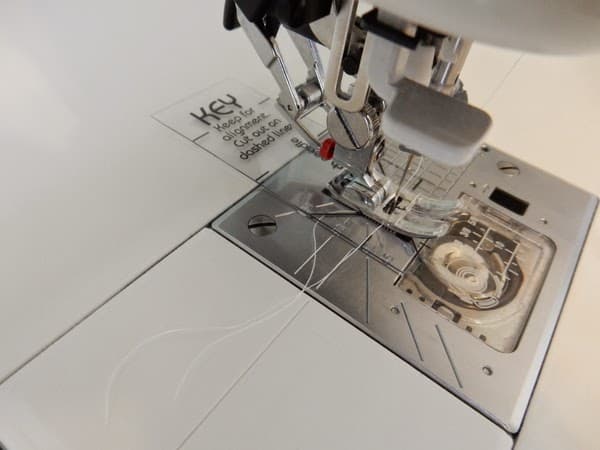
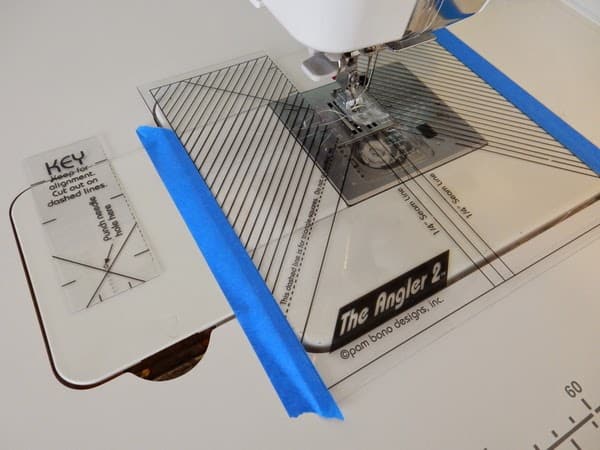
Put the “key” section under your presser foot and drop the needle down into the hole, lowering the presser foot to hold the key in place. Next you’ll align the Angler template with the key, matching lines until you have a perfect fit.
Tape the Angler to your machine (Washi tape works also), and then raise the presser foot and remove the key.
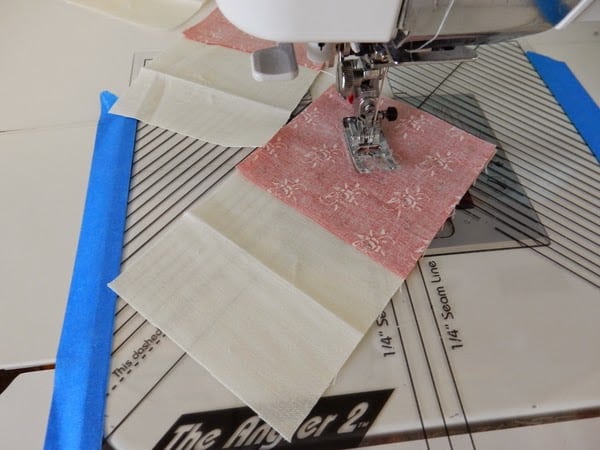
Now you’re ready to start sewing. I prepare all of my pieces ahead of time so I can chain piece my blocks. Put the needle into the fabric at the diagonal point, and line up the opposite corner with the center line on the Angler.
Continue sewing, keeping the bottom corner aligned with that center line.
You can keep adding your prepared fabric units, chain piecing these blocks.
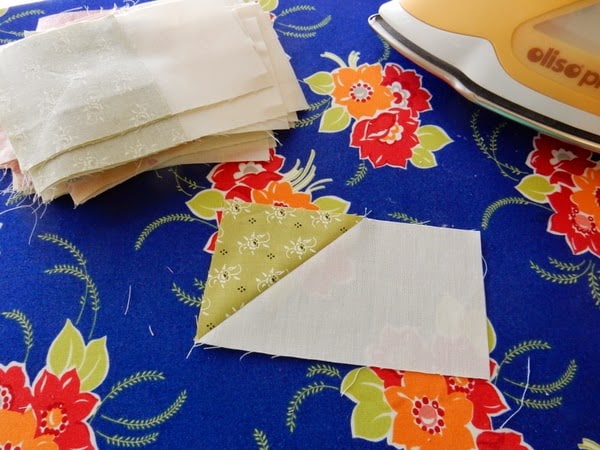
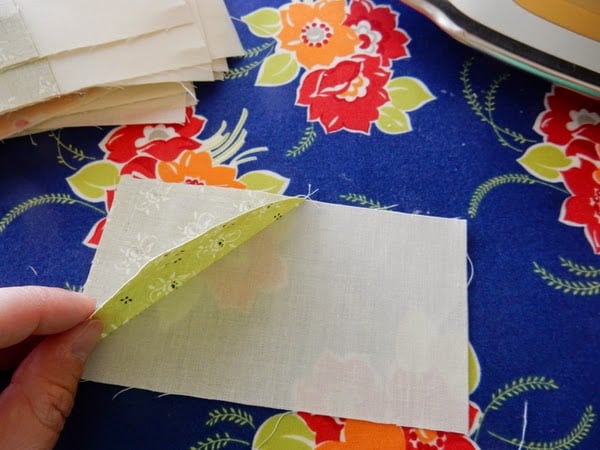
After piecing, press to set the seam, then press the square toward the corner. By pressing before trimming you can check for accuracy. If anything has shifted and made your unit “off” you will readily recognize the error and can fix it at this point.
After you’ve pressed your units, you can trim the extra fabrics, leaving a ¼″ seam allowance.
When the left over pieces are big enough I save them to sew into a half-square triangle.
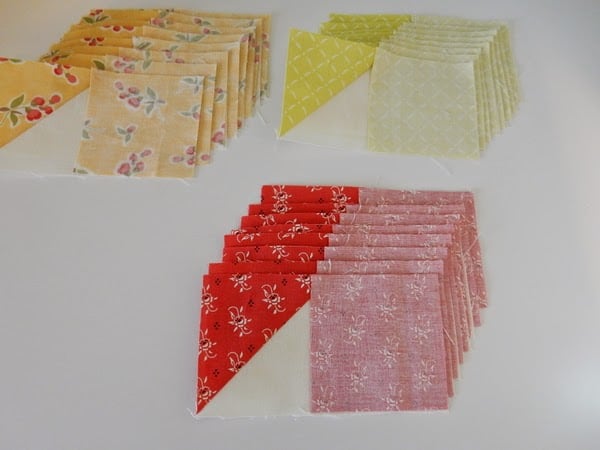
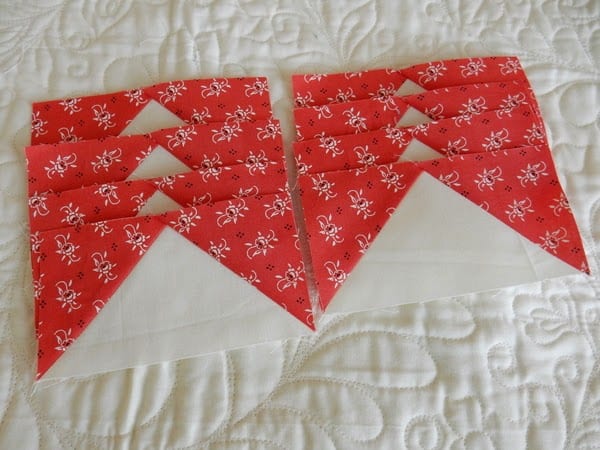
After all the blocks are trimmed you can prepare the other side of the units by laying out all the pieces. Again, chain piecing saves a lot of time!
Here are some additional tips:
- Be sure you install a new bobbin before using the Angler if the template covers your bobbin case. This way you can sew a lot of pieces without having to worry about moving and re-installing the template.
- It’s also a good idea to start with a new needle when sewing these units. I’m not always very consistent with making sure to change my needle, but I do change it when working on these if I know it has been awhile–it really does seem to make a difference, and there are fewer puckers caused by a dull needle keeping the fabric from moving smoothly.
- Don’t worry about going super fast–you’re already saving a lot of time by chain piecing these units, so sew slow enough to make sure your block is aligned with the line for accuracy.
If I’m only making a few units I will go ahead and draw lines with a pencil, but for big projects I always use this method.
Thanks so much for stopping by!





Hildy says
Last year I've made some flying geese for the Night Sky pattern and since I really want my points to line up I've used this methode: http://janainamachado.blogspot.de/2014/11/night-sky-qal-hop-and-tips.html
Now I'm always making my flying geese this way because it works best for me:-)
Needled Mom says
I use this tool and love it.
Tracey Holzer says
The Angler 2 is one of my all time favorite tools that I own. I have mine taped onto my cabinet table and I don't have to retape it after changing my bobbin thread. I only have to slide my extension table off and on again. The Angler 2 is great for sewing together binding strips as well. Thanks for sharing your info!
alicuz quilts says
I am not able to find this tool online. Any suggestions on where to find it? Thanks so much and I love your blog!
Malinda says
I'm curious about all the other lines on this template, do you ever use them? Instead of marking each diagonal line on my fabrics, I cut a piece of painter's tape to a scant 1/4 inch with an old rotary blade, then carefully place it on my machine bed, lining up one side with the stitching line and the other side at the scant 1/4" seam line. This gives me a line to guide my fabric corners on as they are fed under the feed dogs, but am I missing something all those other lines would be useful for? Thanks for the tips, love your blog!
CJ says
Like Malinda, I've always wondered what all the other lines are used for. Also, if I am to sew on either side of center and then cut down the middle can that be done without the marking?? I have a few projects coming up that require a LOT of HST so knowing this would help. Yes, I even already own this tool. :S
Peggy Wilson says
I looked on amazon and it was out but there is another tool called Clearly Perfect Angles that appears to do almost the same thing. I think Lori Holt said we may not could get again bc Ms Bono died.
linda neal says
Check out You Tube for how to use the tool.
Polly says
Sherri, did you post the AYOS project for this month yet?
Josie McRazie says
Very cool tool! I have to say I have a laser light on my machine (the Brother Dreamweaver) and I use that for this!! It is WONDERFUL!!
Katharina says
Thank you very much for describing this needful toll,I will order it for saving time with all this flying geeses!
Judy says
I use this for all my quilting squares. I have a new 1/4 foot for my Bernina and use this instead of the guide. Thank you for the hints.
Judy
Michele says
I really do need to get one of these so I don't have to draw those lines any more.
Carla says
Nice little tool to have. May have to check into
thanks for sharing
Carrie says
Just so you know, The Angler is no longer available. The company closed following a family tragedy. Clearly Perfect Angles is the only similar kind of tool.