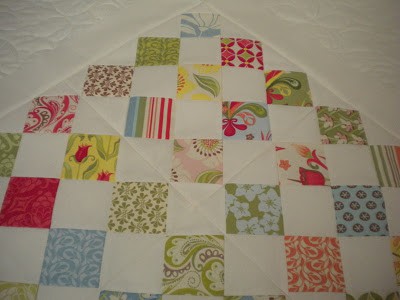
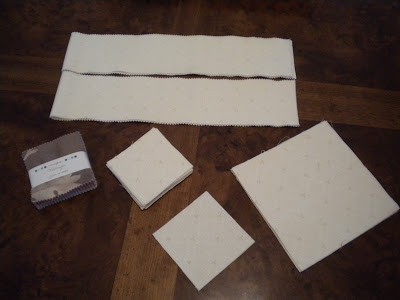
 What you need: For both quilts you’ll need one pack of 40-2 ½″ squares from a Moda Bake Shop Sampler Box, and ½ yard of background fabric. Cut 2-2 ½″ by width of fabric strips of background fabric for borders. For the four block method you’ll also need: 8-2 ¾″ squares of background fabric cut in half once diagonally for corner pieces, 8-4 ⅞″ squares of background fabric cut in half twice diagonally for side triangles, and 16- 2 ½″ squares of background fabric for alternating squares.
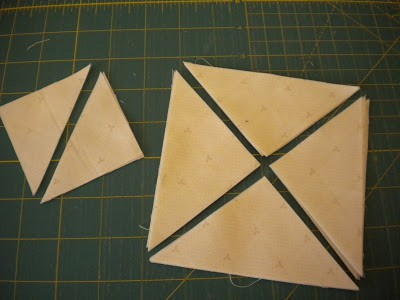 Cut your side and corner pieces as directed.
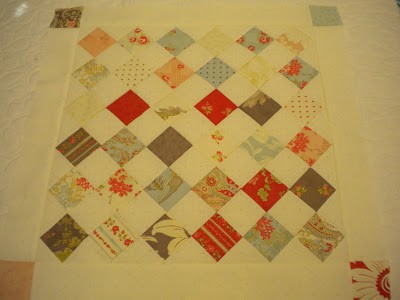
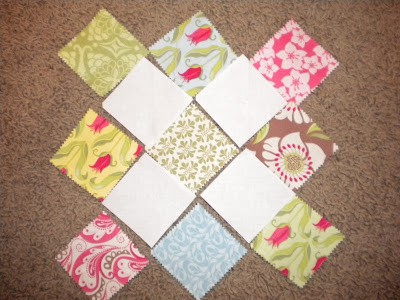 For the four-block method you will choose 9 print fabrics for each block and lay out alternating with background squares. Repeat four times so that you have four blocks put together in pleasing color combinations. You will have 4 print fabrics left over…save these for the border corner posts.
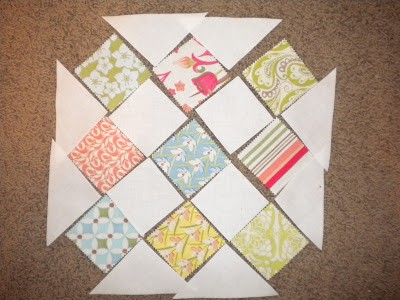
Go ahead and lay out the side triangles and corner triangles (corner triangles not pictured here). Don’t worry that the triangles seem a little large…you can trim them later.
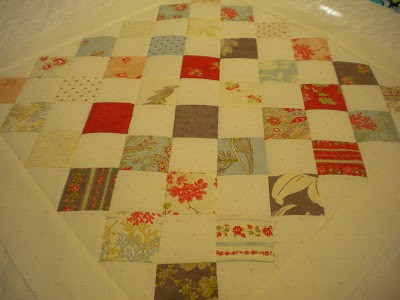
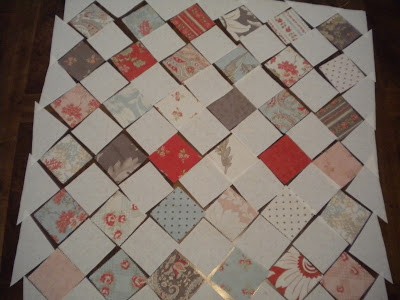 If you are using the row/single block method…lay out the whole quilt at this time using 36 colored squares and all of the background squares and triangles. You will have four colored squares left over…save these for the border corner posts.
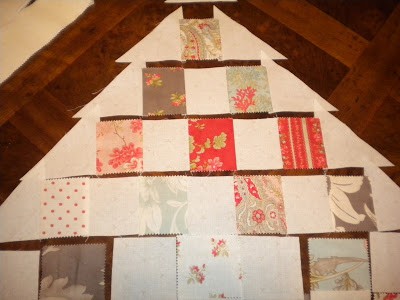 Now the construction is the same…start sewing pieces together in rows using a scant ¼″ seam allowance. Don’t sew any of the corner triangles yet (there will be 16 corner triangles to add for the four block quilt and 4 corner triangles for the other one). Press all seams towards the sampler box squares.
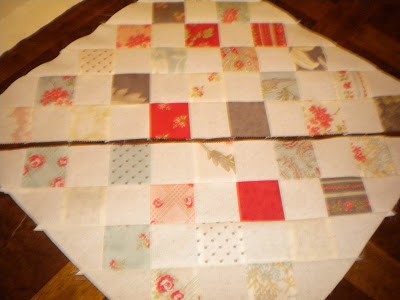
Next you’ll sew the individual rows together. Each block in the four block quilt will have 5 rows. The single block quilt will have 11 rows to sew together. For the single block quilt I sewed six rows together; I then sewed the other five rows together before sewing the two halves together into one piece. After adding each row, press to one side.
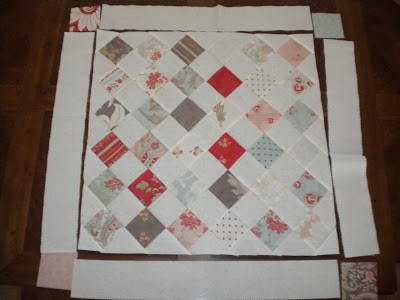
Now measure your topper through the center (in each direction) to find the measurement to cut your border strips. This measurement should be close to 18″. Lay out your border strips and the remaining four colored squares. Sew the left and right border strips to your quilt, pressing towards the borders. Then, sew the squares to the left and right sides of the remaining two border strips. Again, press towards the border fabric. Then, sew the top and bottom border fabric strips to the top and bottom of your quilt. Press towards borders, and you’re done!

Darlene says
Very, very cute. A couple of months ago I wrote a similar pattern for a local quilt store. The owner wanted something her customers could make with a variety of prints – this is perfect for anything fabrics. Awesome tutorial, Sherri.
Happy Cottage Quilter says
Don't you just love it when things just seem to flow and go together 🙂
Nedra says
The fabrics really make that table topper cute, Sherri. Fun tutorial.
Carol says
Cute! Thanks for making a tutorial. I have my sampler box and I can't wait to use your tutorial and make my mini quilt.
Cara says
Can't wait to see what other things you do with your sampler box.
Mary Grace McNamara says
Great instructions! This would also be a good way to use a charm pack and make a bigger quilt. Love the fabrics you used.
MGM
Amy says
Thank you for the table topper tutorial. It is really cute and much appreciated!
badlandsquilts says
Very cute!
Sheri Howard says
So very sweet. Thanks for going to all that work!
Beverly says
Love the look of this … hoping I can find the time to pull one off for Christmas since Thanksgiving is way too close!
Mary on Lake Pulaski says
Thanks Sherri – this is so cute with those little squares.
Joy says
What a great tutorial Sherri, thanks for sharing with us all!!!
Hugs,
Joy :o)
Carol says
Very cute! Can't wait for what you do with the other squares…Great tutorial.
Stephanie says
Cute as can be! Thanks for sharing.
Libby says
Great Pattern! Thanks for all the work that you put into it for us! Looks like alot of fun!
Simone de Klerk says
Thank you so much, Sherri, for this great tutorial. I will try to make the top this week!!! Not sure which sampler I will use, but that is fun, so I will have a closer look at them (O:
Do you mind if I link this tutorial on my blog?
Have a lovely Sunday!
Simone de Klerk says
PS: I'm looking forward to your other designs (((O:
Anne Heidi says
Oh it is sooo cute! Thanks for the tutorial 🙂 I'll definately be making at least one of these!
Amanda says
This is too cute! Thanks for sharing!
The Quilt Buddy says
I am loving it!
Kaaren says
Great tute, Sherri. Thanks for sharing.
Chocolate Cat says
Oh thank you! I can't wait to try this, I am going to have to start stalking the postie waiting for my sampler box to arrive!!!
Dawn says
The table topper is darling. Thanks for sharing.
Messy Karen says
i like it!
Jane's Fabrics and Quilts says
Oh thank you so much for sharing!!
Janet says
Very cute and would make a nice doll quuilt too. Thanks for sharing the tutorial with us all.
Sinta Renee says
How nice of you to make up the tutorial Sherri! It is so sweet in your new fabrics but would also look good in holiday fabrics and make a good little gift also!
Cindy says
This appears like it might be a fun little project for a tabletopper. Thank you so much for your tutorial that is easy to follow and understand.
Happy Thanksgiving. Eat and enjoy!
*°º¤♥-=|F®äñ|=-♥*°º¤ says
Adorable site =)
Diane says
Super cute! thanks so much for putting together the tutorial
Red Geranium Cottage says
I LOVE that quilt and that fabric. Darn it I do not need to be buying anymore fabric but…….I LOVE IT.
Kelly@ Charming Chatter says
Thanks for the great tutorial! I've been trying to decide what to do with my sampler box, and this is just great!