Hello and happy Wednesday! Thanks so very much for all of the support for this organizing series. If you come across any tips to share as you are working on these projects, please leave your ideas in the comment section on any of the posts in this series; later, I’ll set up a page to compile reader tips so it’s easy to find them all in one place. Also, there is now a button available on my sidebar which has code to link to the first post in this series. The first post will be updated to include links to each added topic.
At this point you should have taken a “before” picture and have two lists in hand: a “works in progress” list and a “want to make” list. As I spent some time reviewing my lists I decided to divide each list into three categories: a “no deadline” list (for those on-going projects you don’t mind working on over time–an example of this from my list is my Grandmother’s Flower Garden paper pieced hexagon quilt), a 3-month completion list, and a 1-year completion list (as projects from the 3-month list are finished up you can move projects from the 1-year list down to the 3-month list).
Also, remember to keep in mind that things might get a little messy before they get cleaned up…at least that’s what is happening over here! I’m actually using the bed in our guest room as a holding area for things while I decide where to put them…I think our dining table might be used for this purpose soon as well. Okay…so it’s on to our next tasks!
Day Three: Clear off flat surfaces: the sewing table, ironing board, and any other surfaces in your sewing area.
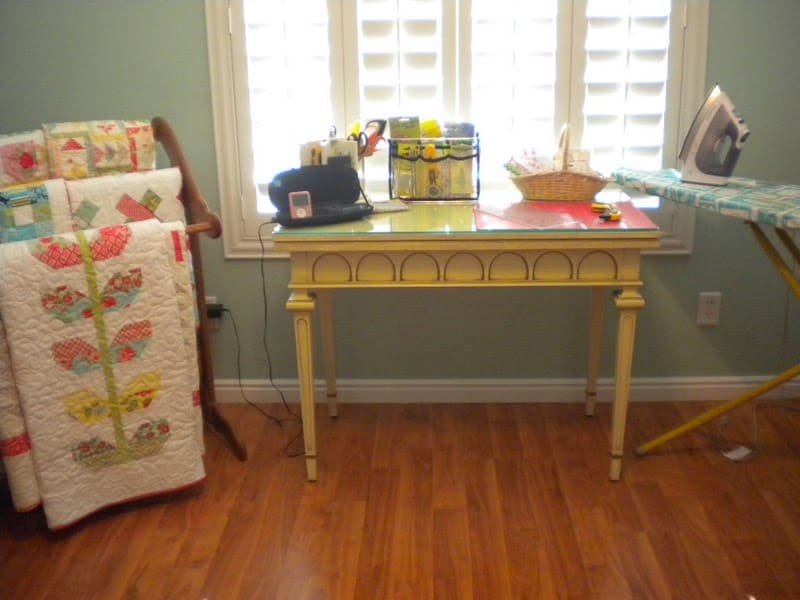
I tend to make piles, so this task is taking quite a bit of time for me. First, I cleared off my ironing board and placed everything in the other room. Sometimes I stack things there…and they stay because I have just enough room to iron without moving anything. I do have a terrific magnetic bowl I keep at the end of the ironing board which holds a few pins and a small pair of scissors–that and a bottle of spray starch are the only two items I kept on the ironing board.
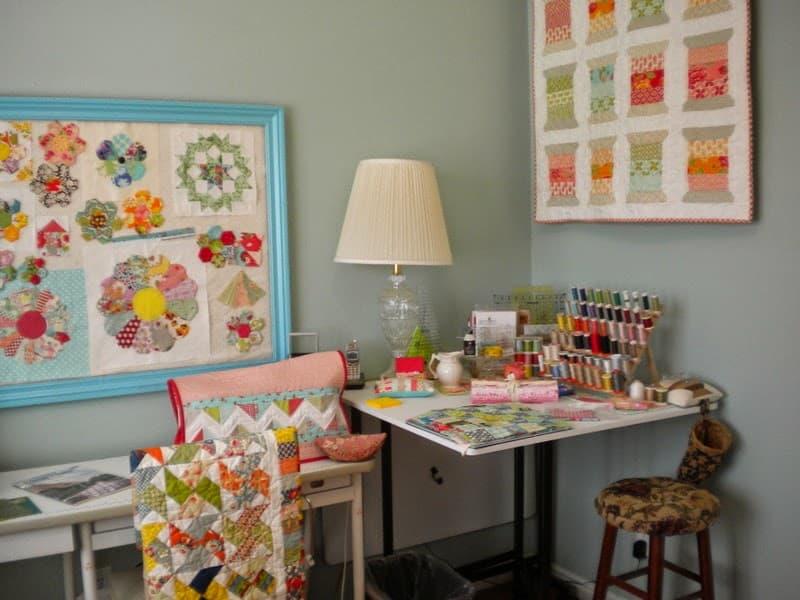
Small piles also tend to accumulate on my sewing table, so I cleared that off next. Finally, I have two tables in my sewing room where I keep notions and things. Clear everything off! (Note: the photos in this post are from January 2013…and the sewing room hasn’t been this clean since).
If you have shelving units take off anything that isn’t supposed to be there and put it somewhere else for now. Be thorough with this step, and things will be easier later.Things that are well-placed on shelves can stay (the “if it isn’t broken, don’t fix it” philosophy).
If possible, take everything you are moving to another room…it will be easier to bring back what you want and put it in the best place if you have clean surfaces to re-organize. While your surfaces are completely clear, clean them up: I hadn’t dusted my tables for quite a while, so it was good to really clean them to a shine! Don’t put anything back yet…you’ll start doing that soon.
Day Four: Gather rulers, rotary cutters and scissors.
Today’s task is an easy one (yesterday’s involved a bit of work, and the weekend task is a more time-consuming one as well). Simply gather all of your quilting rulers, rotary cutters (extra blades, too), and scissors. Make three piles–one pile for each type of tool. Next, you’ll need to make a few decisions: Which rulers are essential? Are there any you might need to donate or throw away? Do you have too many rotary cutters? Do you have spare blades, or should those go on your shopping list? (Feel free to start a shopping list…but don’t buy anything until later…more on this soon)? Do your scissors need sharpening? Do you have enough scissors? I like to have a pair at the ironing board, a pair at my machine, and a pair on my cutting table. I also have small scissors I keep in a few different little bags: I keep a pair in my binding bag, a pair in my English Paper Piecing bag, and a pair in my applique’ bag.
Next, decide where the best place will be for all of these items. If you have a table top ruler rack, wall storage system or drawer that has been working well for you for any or all of these items then feel free to put these items back now. If you don’t have designated spots for these items yet, decide where you want to keep them.
If you feel like there might be something you need to keep these items in better order, put that on your shopping list with a note about how you plan to use the item to help you stay better organized.
Let me know how it’s going, and remember to share tips and suggestions in the comments…I’ll be back on Friday with one more task for this week! Thanks so much for stopping by!


Carrie Merth says
Loving this!!!
Your sewing room is so pretty.
Patti says
This is really GREAT. Thank you so much.
Patti says
This is really GREAT. Thank you so much.
Jeanna says
Can hardly wait to get home to start on these tasks.
My lists are slightly different, I made three: works in progress (projects I am currently working on), UFOs (projects I started but didn't finish and they are put away somewhere, then the To Do list (projects I have the materials for but haven't started).
I'm so happy you have initiated this as it is going to really help me.
Sandie @ crazy'boutquilts says
Any ideas for ruler storage? I can't really spare the space for a table top rack, yet I want my rulers close at hand…? Thanks for all the tips!
Joan says
Lovely sewing room! Thanks for the ideas!
BillieBee (billiemick) says
I'll be working along slowly. All the grandkids will be here Friday so needless to say not much will happen here for a while.
I love your sewing room….lovely.
mascanlon says
well I have 3 days off this weekend so will be doing most of these tasks on Saturday plus the new ones. Somehow I knew you'd have us clean up those flat surfaces piles with stuff. But I feel much better since you admitted your table was dusty too…lol
Gai Butler says
This is a great series and I'll be following closely. Having just moved into my new sewing space, complete with newly painted walls, new tables & shelves, I have already implemented some of these ideas. Each of my projects has the following, all in clear display pockets or individual folders if they have multiple pages, a Project Information Sheet & a printed pattern. These are then stored in one of three magazine file holders labled: File 1 – CURRENT (Finish First or by specific deadline); File 2 – ON-GOING (These have no deadline but do need attention and can be moved to File 1 as that file empties); File 3 – FUTURE PROJECTS (Details kept here of projects that I want to make and have started gathering resources for). Once a project is complete, all relevant pages are moved to a large COMPLETE PROJECTS folder/s for future reference. Lets hope this series KEEPS me organised. Sorry for this being so long.
Hildy says
Your tips are really great, thank you! I'll follow along but since there's not there much time during the week I'll see what I can do on the weeekend.
BTW I love the dress quilt you have hanging over your iron board. Can you tell me what pattern it is?
Cheryl says
Well, I got my list done (I think, but you never know what might still be lurking somewhere) and now I feel COMPLETELY overwhelmed!! I took a year off from quilting in 2011-2012 due to illness, and things really accumulated!!! I guess I really need this to get myself back on track. One thing I did was to mark next to each project what itechnique it was (appliqué, piecing, wool, paper piecing, etc). Now if I am looking for a specific technique, I can go to it on the list. I need to just decide if I want to make separate lists by technique or by priority. Thanks again Sherri for getting me motivated!
OPQuilt says
It's good timing for me for this, sort of. I plan to tackle this sort of clean out after some traveling, but will use these ideas as a roadmap. Thanks for this series!
Elizabeth
mary says
This is very timely for me right now. Have just downsized to a smaller home. But I still have a sewing room–just smaller–and I have to share it with the treadmill. I may not get these steps done too quickly, but it is giving me perspective on what to keep and what to get rid of. Thanks.
Brenda Simmons says
Thanks so much for doing this. I have been working on organizing and this helps. One thing I did (suggested by a friend) is to put a small command hook on the end of my sewing machine and keep very small scissors there. I use these a lot.
Melanie B says
I'm keeping up with the tasks daily, and spent a little extra time sorting/folding fabric last night. This has been super helpful so far!
Scattered Threads says
Sherri, I'm tracking here. Looking forward to today's post.
Jackie:)
Billy'sgirl says
OK, I took pictures of my sew room.
🙁
Your sewing room is so pretty and inspiring, and so organized! I am shopping for shelving, plastic tubs, etc. to organized what has become an overwhelming stash. It would be so nice to see what I already have at a glance, especially background fabrics and blenders.
First, everything out, and new paint and curtains!
Sarah says
Oh gosh you sound like me. I have neat piles everywhere!