Hello! Today I have a fun Patchwork Christmas Pillow Tutorial that is terrific for adding a holiday touch to your decor or perfect for gifting to friends and family. Grab your 2 ½″ wide scraps in red, green, and aqua along with some background fabric and have fun stitching this patchwork Christmas tree pillow!
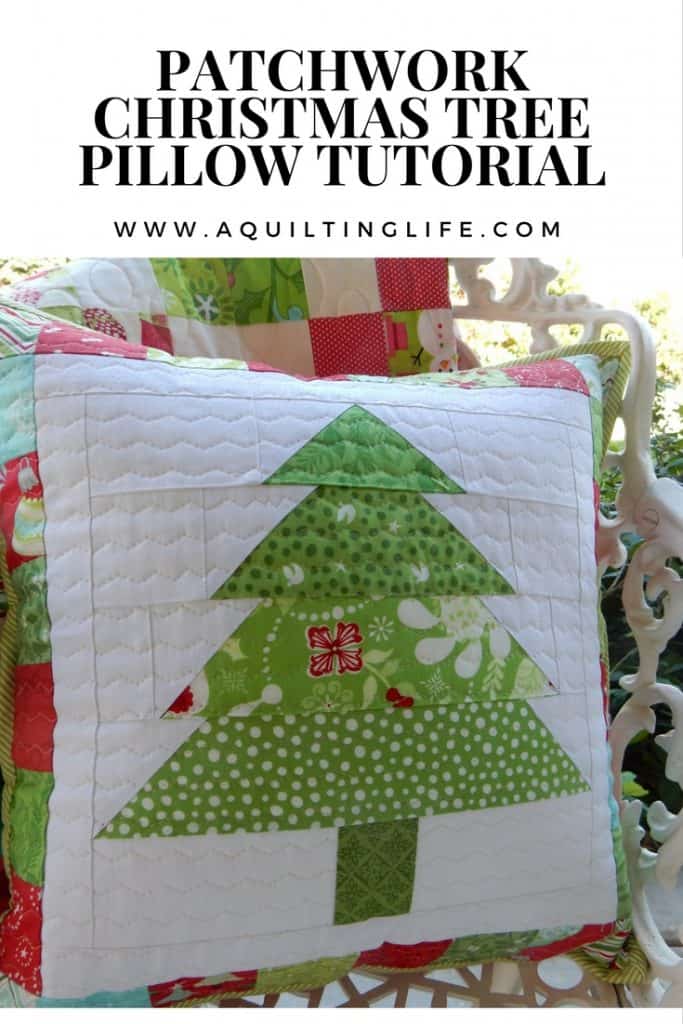
Nearly all of my fabrics were left over from a few Kate Spain Christmas collection from a few years back. I think there are a couple pieces from Aneela Hoey’s Cherry Christmas as well, and my background fabric is a white on white by Michael Miller that I’ve had for a few years.
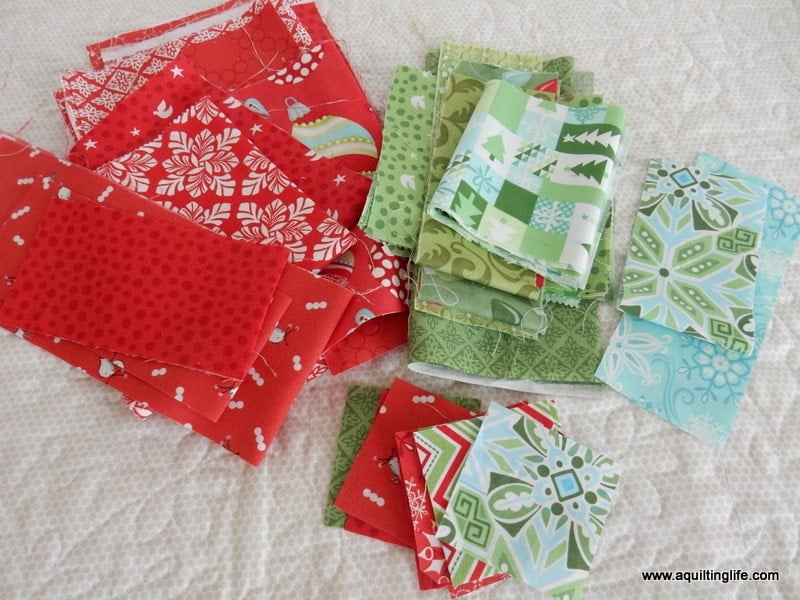
Cutting Instructions:
(Finished pillow is 16″ x 16″)
Tree fabrics:
- From 4 different fabrics or 1 fabric: Cut (1) rectangle 2 ½″ x 10 ½″, (1) rectangle 2 ½″ x 8 ½″, (1) rectangle 2 ½″ x 6 ½″, and (1) rectangle 2 ½″ x 4 ½″.
Trunk:
- Cut (1) rectangle 2″ x 2 ½″
Background:
- From 2 strips 2 ½″ x width of fabric: Cut (2) rectangles 2 ½″ x 4 2/4″, (2) rectangles 2 ½″ x 3 ½″, (10) rectangles 2 ½″ x 2 ½″, and (2) rectangles 1 ½″ x 2 ½″.
- From 2 strips 1 ½″ x width of fabric: Cut (2) rectangles 1 ½″ x 10 ½″ for inner left and right borders and (2) rectangles 1 ½″ x 12 ½″ for top and bottom inner borders.
Outer Border:
- Cut 28 squares 2 ½″ x 2 ½″ from a variety of red, green, and aqua Christmas print fabrics.
Flap-style Pillow Back:
- Two rectangles 11 ½″ x 16 ½″ (see note below for directions on finishing)
Binding:
- Cut 2 strips 2 ¼″ x width of fabric for binding.
Make the Christmas Tree block parts
1. Begin by drawing a diagonal line on the wrong side of 8 squares 2 ½″ x 2 ½″.
2. Place a square from step 1 above right sides together with a green rectangle. Sew on the drawn line and press out. Trim the extra background and green fabric leaving a ¼″ seam. Repeat for the remaining three green rectangles.
3. Repeat with another square from step 1 on the opposite side of the rectangle. Repeat for the remaining rectangles.
4. The top of the tree will look like figure 1, and the remaining three parts of the tree will look like figure 2.


Assemble the tree block and inner borders
1. Add the remaining background rectangles and squares to either side of the tree rectangles as shown in figure 3 below (measurements for background pieces are the same on either side of the tree section).
2. Sew the tree block rows together. Press seams in one direction.
3. Add the 1 ½″ x 10 ½″ background border rectangles to the left and right sides of the tree block. Press out toward the background rectangles.
3. Add the 1 ½″ x 12 ½″ background border rectangles to the top and bottom of the tree block unit. Press out toward the border rectangles.

Add the pieced border
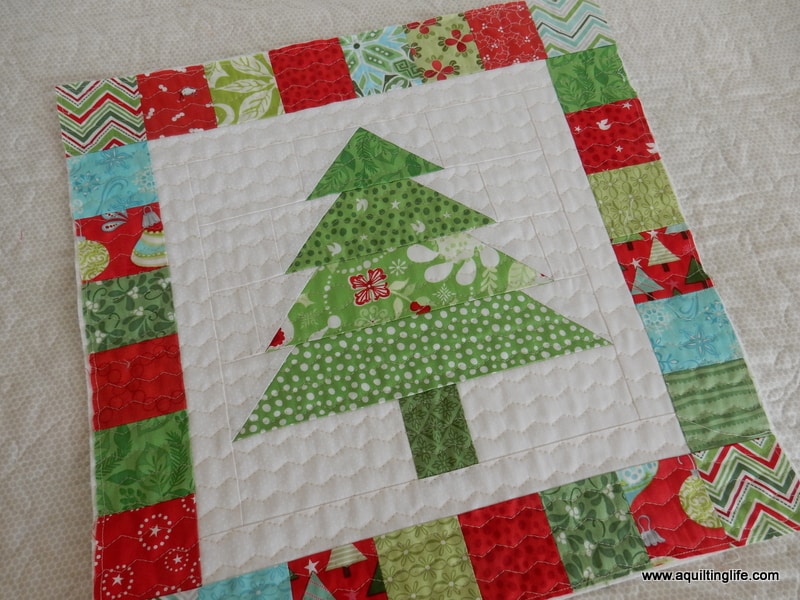
1. Arrange the 28 squares 2 ½″ x 2 ½″ around the tree block unit until you like the arrangement of prints and colors.
2. Sew six squares together for the left border and six squares together for the right border. Sew borders to the tree unit and press out towards the borders.
3. Sew eight squares together for the top border and sew the remaining eight squares together for the bottom border. Sew the top and bottom borders to the unit in step 2 above and press seams out towards the borders.

Finishing
After piecing the Christmas tree block stay-stitch ⅛″ around the outer edge to keep the seams between the patchwork squares from opening up.
Layer the block, batting, and a lightweight cotton fabric and quilt as desired. I used a wavy line on my sewing machine, but I think cross-hatch quilting or hand quilting would be equally cute for this project.
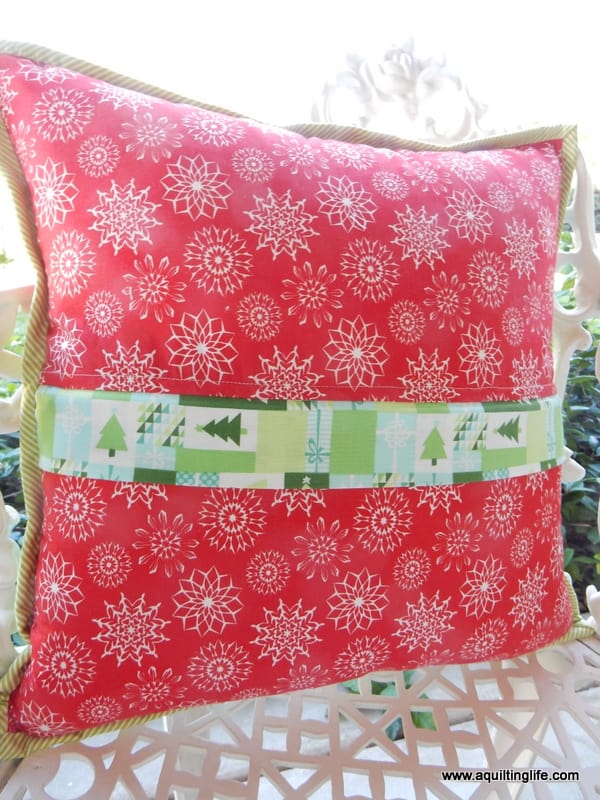
Note: I made a zipper closure covered by a decorative flap for my pillow, but you can make a simple flap–style pillow back by following the directions found in my Scrappy Patchwork Pillow Tutorial (the pillows are the same size, so the measurements for fabrics for the pillow flap back are the same).
Sew the pillow front to the pillow back. Finish your pillow by joining the binding strips and binding the outer edges. If you need help with binding you can watch my binding tutorials on You Tube here:
If you decide to make a pillow (or two or three) using this tutorial, I’d love to see them!

Thanks so much for stopping by!


Little Quiltsong says
Love this Christmas Pillow. Your last tutorial made me pull 3 of my orphan blocks and make them into pillows. Afterwards I wondered why I hadn't done that sooner. Thank you for this new tutorial. I need to spruce up my couches for the Christmas season!
Danette Stankovich says
This is just too cute. Love this tutorial! I'll have to add this to my sewing list.
Summer says
Beautiful pillow♥
Needled Mom says
That is just lovely.
julie says
Very nice. What is the size?
Hildy says
Cute pillow cover! Your tutorials are always great:-)
QUILTING IS BLISSFUL, DI says
Ohhh–how timely—I actually was able to get into a quilt shop yesterday and I see a cute little hanging very nearly like this one — I even got a green print to make one–but could not afford the kit –so last night I was trying to figure out what I seen and how to make it–and low and behold–here it is–so I thank you for this timely pattern–
love and laughter, di
Libby says
Perfect timing for me also………….and I love, love the tutorial !
Thanks so much !
Bari Jo says
Thank you for all the holiday inspiration!!! xoxo
Gilda says
Thanks for this cute Christmas pillow tutorial. It's going to be my next project!
Nadine Donovan says
This is really such a cute pillow. I just printed off the directions— I am planning on making it this weekend. Thank you so much for sharing!!!
jukiejeans says
Cute pillow! I've made 2 pillow tops already this morning. There is a typo in the instructions though. It says to cut 2 each background pieces 2 1/2 by 4 2/4. It should say 2 1/2 by 4 3/4.
Dee says
Thank you Jukiejeans as I was wondering what that was supposed to be! 2 1/2 x 4 1/2 or like you said, 4 3/4! That saved me a question to Sheri!
Dee says
I just got my fabric (jelly roll) and can't wait to get started. I am making 3 pillows for my son's teachers for Christmas gifts.
Monica says
I'm on vacation leave the next couple days and plan on making a couple tree pillows. (and possible the STAR pillow from a previous post-i had bought this pattern last year) Thank you for your wonderful ideas you share.
Monica says
Thank you for your comment on the corrected size of 2 1/2. i was trying to google what that was until i read the comments!! -_- 🙂
Chick says
Thank you for such a great pattern—I made two cushions with blue the main color in different prints to coordinate with my daughter-in-laws decor. They look so nice. I am sure I will be making more as gifts. Pretty and useful!
Dollandesign says
I am a woman from Sweden and I like your pillow tutorial.
Thank you!
I now have used your tutorial and to day you can see it on my blogg, Dollandesign, if you would like to.
Dollandesign
Two says
Thanks for the tutorial! I have posted pictures and link to a pillowtutorial on your homepage, dated nov.9. on the homepage of our quilt group i Norway, Nordfjord lappe- og quilteklubb! In december we have a theme: christmastrees, a new tree every day!!
Merry christmas to you!
Mariann Hatlenes
http://nlq2007.blogspot.no/2016/12/21-desember.html