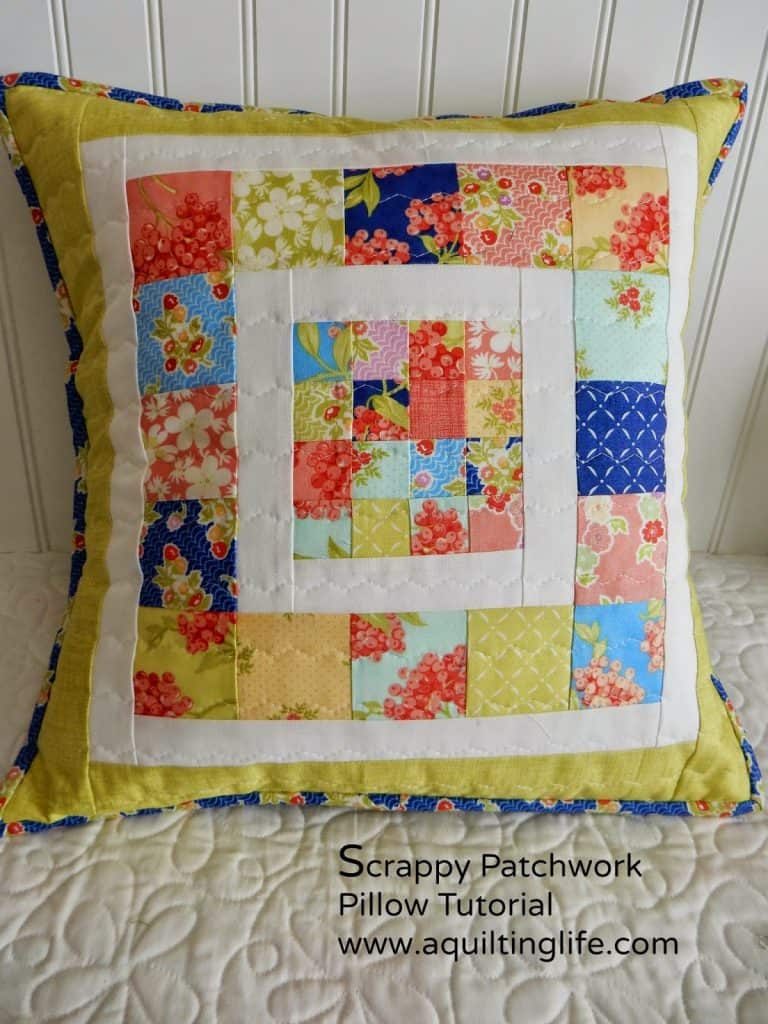
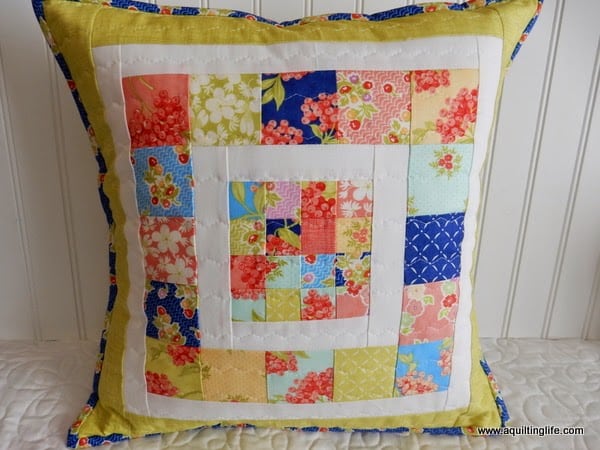
Today I’m sharing a Scrappy Patchwork Pillow Tutorial. You can use your scraps or a Moda Candy pack also works perfectly for the print patchwork squares. Keep reading for all of the details for this quick project.

Do you ever have scraps that are just too precious to part with? Or that perhaps you don’t want to get lost in a bigger scrap project? And that you want to use now? After finishing up another Fig Tree quilt with Aloha Girl this week I wondered what to do with my precious scraps. The Aloha Girl collection is a favorite of mine, and won’t be available until spring, but I wanted to make something to enjoy now! I started piecing some 1 ½″ squares, and…well…now I have a pillow!

Fabric Requirements
Patchwork Fabrics (can be cut from one Moda Candy pack):
16 squares 1 ½″ x 1 ½″
16 squares 2 ½″ x 2 ½″
Background Fabric (⅛ yard)
2 rectangles 1 ½″ x 4 ½″
2 rectangles 1 ½″ x 6 ½″
And 2 rectangles 1 ½″ x 10 ½″
2 rectangles 1 ½″ x 12 ½″
Border (5″ by width of fabric or ¼ yard)
2 rectangles 2 ½″ x 12 ½″
2 rectangles 2 ½″ x 16 ½″
Binding (⅛ yard)
2 strips 2 ¼″ x width of fabric
Pillow Back (⅓ yard)
2 rectangles 11 ½″ x 16 ½″ for flap pillow back
Batting 20″ x 20″
Muslin or Cotton 20″ x 20″
Block Assembly
1. Piece 16 1 ½″ squares together in four rows of four squares each.
2. Add a 1 ½″ x 4 ½″ background rectangle to the left and right sides of the 16-patch unit. Press toward the background rectangles.
3. Add a 1 ½″ x 6 ½″ background rectangle to the top and bottom of the 16-patch unit. Press toward the background rectangles.
4. Arrange the 16 squares 2 ½″ x 2 ½″ as desired. Sew two sets of 3 squares to add to the left and right sides of the unit from step 3. Sew two sets of 5 squares to add to the top and bottom.
5. Sew 1 ½″ x 10 ½″ background rectangles to the left and right sides and press towards the background rectangles.
6. Sew 1 ½″ x 12 ½″ background rectangles to the top and bottom and press towards the background rectangles.
7. Sew 2 ½″ x 12 ½″ border rectangles to the left and right sides and press toward the border fabric.
8. Sew 2 ½″ x 16 ½″ border rectangles to the top and bottom and press toward the border fabric.

Pillow Assembly
1. Layer pillow top, batting, and thin muslin or cotton (centering the pillow top on the batting/muslin pieces) and quilt as desired. I quilted a simple horizontal wavy line design with quilting rows about 1″ apart.
2. Trim the excess batting and muslin even with the edges of the pillow top.
3. To prepare the flap pillow back pieces, finish one of the 16 ½″ sides on each piece with a narrow ¼″ hem.
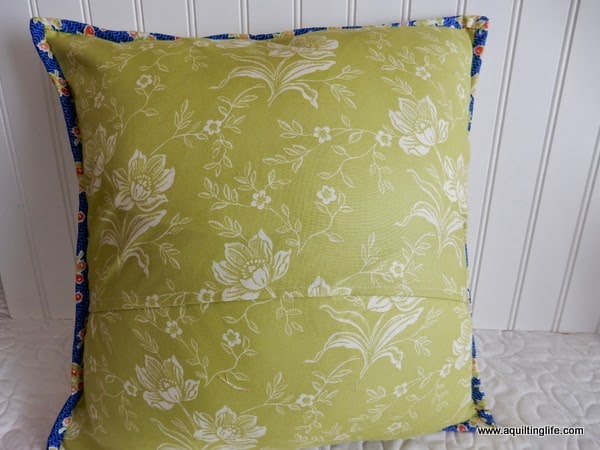
4. Place pillow top face down (wrong side up). Place pillow flap pieces right sides up with hemmed edges towards the middle of the pillow back. They will overlap and allow you to insert a pillow form through the opening when you’re finished.
5. Baste ⅛″ all the way around all four edges.
6. Bind pillow edges with your prepared binding.
7. Insert pillow form (I used a 16″ purchased pillow form for my pillow).

Enjoy!
Thanks so much for stopping by!


Elaine says
Love it!
Melia Mae Quilting says
I just love this! I really need to make some pillows for my house and this would be a great pattern! Thanks again!!!!
Hildy says
Love your pillow! Today I decide to finlly use some of my scraps and made a scrappy backing for the Aurifil Little Quilt this month and it's really cute if I dare say so myself. And I still have a more than full scrap bin to make your illow, I think;-)
Frederique says
Beautiful pillow!
I'm running a fabric giveaway, come and enter!
Janet says
Love all your things… I've been sewing…forever…but new to quilting….and have been reading lots of tips and tutorials…. So…what I'd love to know…..do you prefer wash and press your fabrics or not …..I know there are several ways that quilters like to prepare their fabrics….could I have your thoughts please…. Maybe a good blog post ?
Filomena Crochet says
belíssima!!!!!
Karen - Quilts...etc. says
I have boxes full of little squares – I use some of them but always have a lot left over
Billy'sgirl says
This is adorable!
Thanks, Sherri!
Susan Tidwell says
What a great way to use scraps, and practical too! Love the 16 little squares in the center. I have not heard of Moda Candy Pack, love all the other delicious cuts they have 🙂 I even wrote a story about the origin of precuts on my blog today. Gotta go peruse some more of your great site, have a great day!
gailss says
Another great scrap project and a really cute pillow….like that it takes not a lot of fabrics…..
Michele says
I like, I like. I just might have to pull out a charm pack and make one for me.
Mary Huey says
Sweet little pillow block!! I have some mini-4-patches in progress from the leftovers of a log cabin quilt that would do nicely in this!! Thanks for the idea!
Heather says
This is probably a stupid question, but what size pillow form are you using in this? I am assuming 16inch. Anyway thanks for this fun tutorial I have all the scraps waiting and can't wait to get this one done!
kitty says
Such a lovely pillow! Great way to use a candy pack! Thank you for the tutorial!!
The Patchsmith says
What a lovely cushion. I have declared 2015 the year of the fabric scrap and this project fits right in. Thank you for sharing.
KMSC says
I have an entire box of Moda candy packs that I need to use. Thanks for the inspiration!
Sandy says
Sweet pillow!! Thanks so much for sharing with us.
Sigi G says
Just love this pillow with the new 'Aloha Girl' fabric. Lovely way to use up those special scraps.
Helen L says
great pillow, and it looks easy to boot!! I need to make a few new pillows and I'll be making this one next! Have a great week Sherri, and thanks for the inspiration!! Hugs, H
mascanlon says
Such a cute way to use the candy packs! Thanks for putting together the tutorial!
legato1958 says
What a beautiful pillow and tutorial!
Thanks so much for sharing!
Susie
em's scrapbag says
So very cute!
Bari Jo says
Thank you!!!! What a cute pillow! Appreciate your tutorial!
Sherry says
Thanks for the great tut Sherri! I'm going to add this to my "use it up scraps" list for sure. Love your pillow!
Sew Stitching Cute says
I am OBSESSED with pillows and even better when they are scrappy! I love this and it is such a great line!
Bonnie says
What a nice, simple pillow tutorial. I just got fabric to make a couple of pillows and will definitely use your directions. I thought you'd put piping in but realize it is the binding. Brilliant!
Richard BlackRose says
Nice
MDTerp says
Love your patchwork pillow with tutorial! Another project to add to my quilting bucket list!