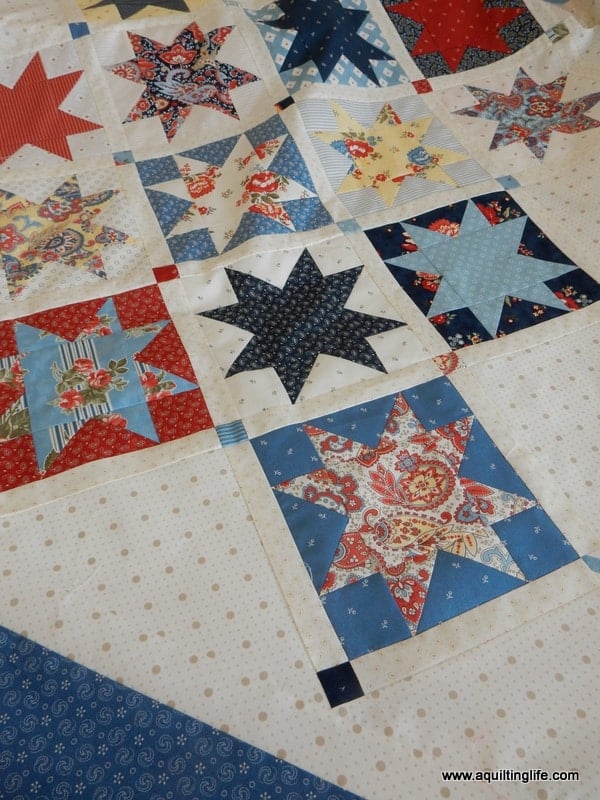
Hello! Today I’m sharing an older post with directions and tips for how to sew an on point quilt. (An on point quilt is one in which the blocks are set in a diagonal setting). I get questions about this topic all the time and hope this post and a recent video can help anyone who needs extra visuals for this process; my Layer Cake quilt, “Hometown,” was the perfect project to use for the photos!
On Point Quilt Tutorial
In this post I demonstrate with a quilt that is set on point with both sashing and sashing
posts. The technique is the same if you’re making an on-point quilt without the sashing/posts or with sashing and no posts. You’ll just have fewer steps for those other variations.
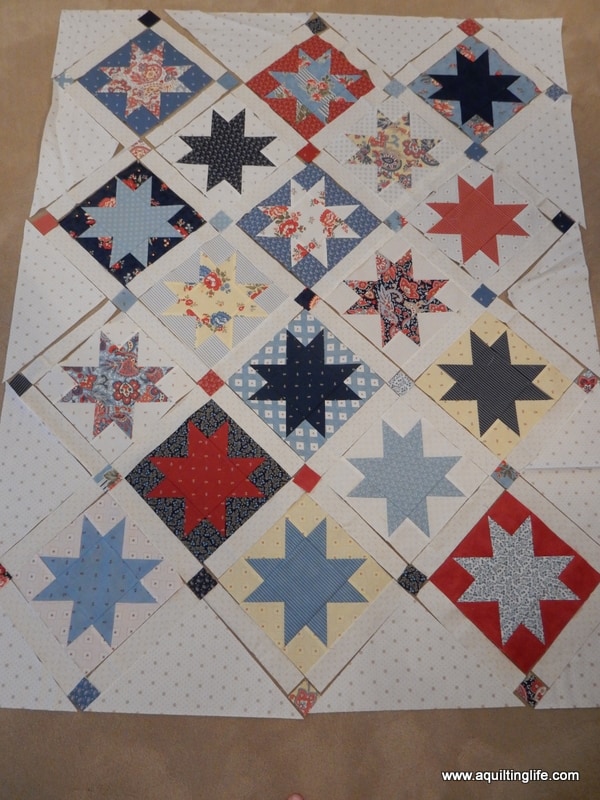
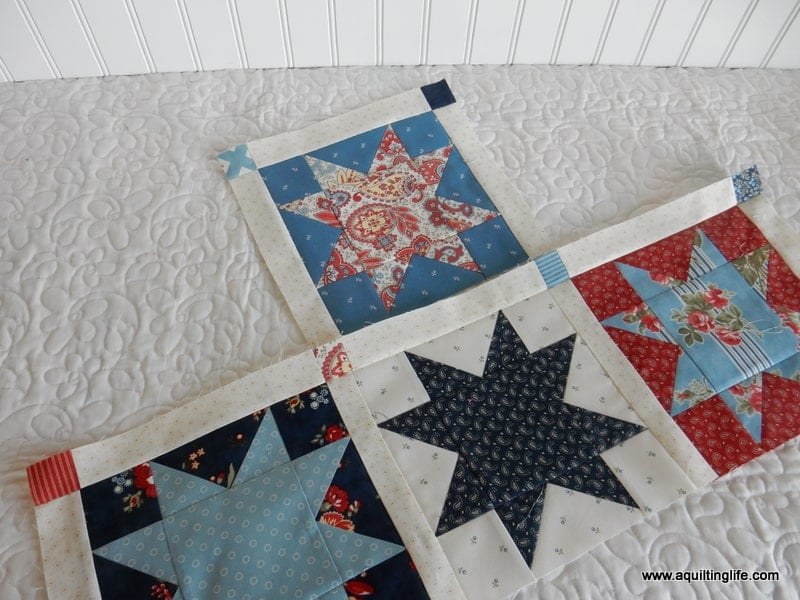
Begin by making all of the blocks for your quilt. Then make sure you have the sashings, sashing posts, setting triangles, and corner triangles cut as well. For beginners: Sashings are the strips of fabric that are pictured on the sides of the blocks below. The the sashing or post squares are the small print squares at the block corners. The triangles on the sides and top and bottom are the setting triangles, with the corner triangles at each of the four corners of the quilt.
Step One
In step one, you’ll lay out all of the pieces and begin sewing rows. First, find a place where you can lay out your entire quilt with all of the parts and pieces. This is a great way to make sure you have the blocks positioned where you want them. At this point, make sure the colors are distributed evenly throughout the quilt. My quilt uses scrappy sashing posts, so this was a great way to make sure I liked the placement of those fabrics as well.
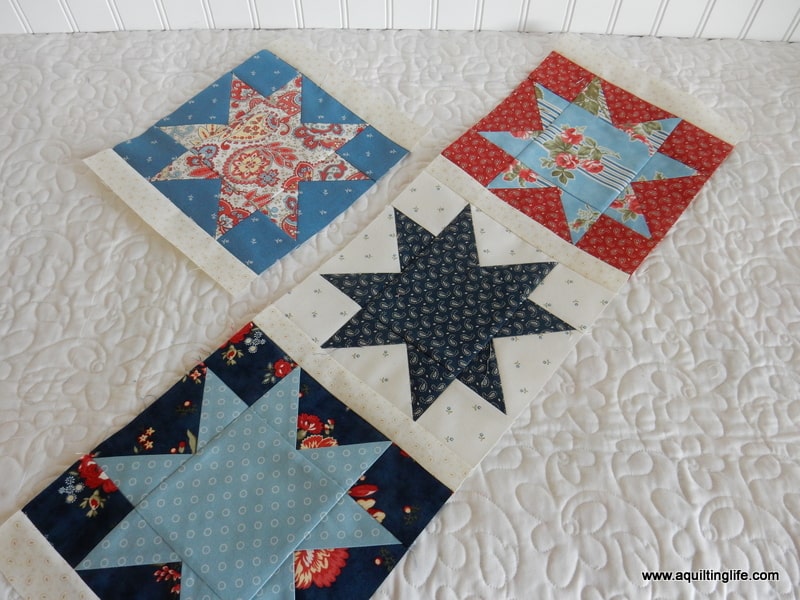
The first step is to sew the sashing strips onto the block sides. When you use sashing, each row begins and ends with a sashing strip. Sew blocks and sashing strips together into rows as shown above. Press all seams toward the sashing strips.
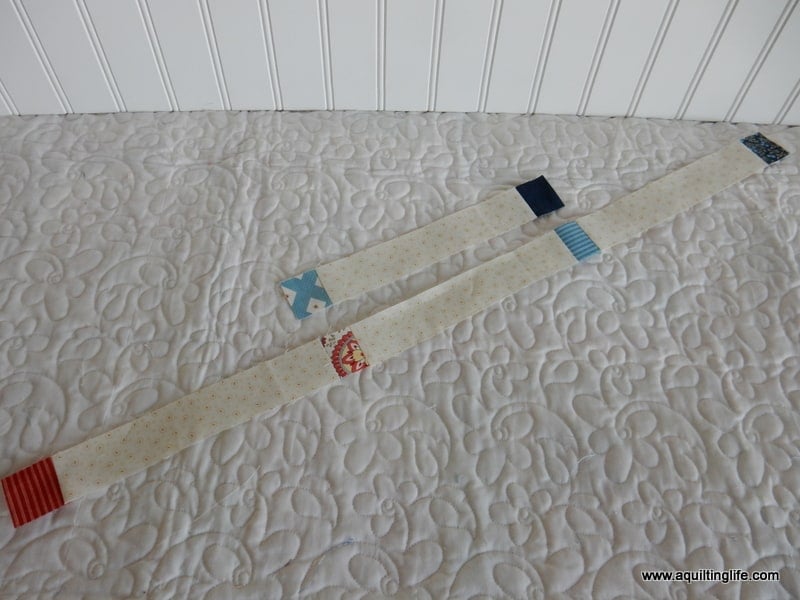
Next, sew the sashing posts to the sashing strips that go between the rows of blocks. Again, press the seams toward the sashing strips. At this point you have sewn all of the rows together in the center of your quilt.
Step Two: Sewing Rows Together
Now you will begin sewing sashing strip/post rows to the block/sashing strip rows. In this quilt, the sashing strip/post rows are sewn to the tops of the first three rows and to the bottom of the final three rows. You will notice that there is a sashing strip/post row between rows 3 and 4 that doesn’t seem to quite “fit.” Leave this sashing strip/post row for later.
Step Three: Add the Setting Triangles
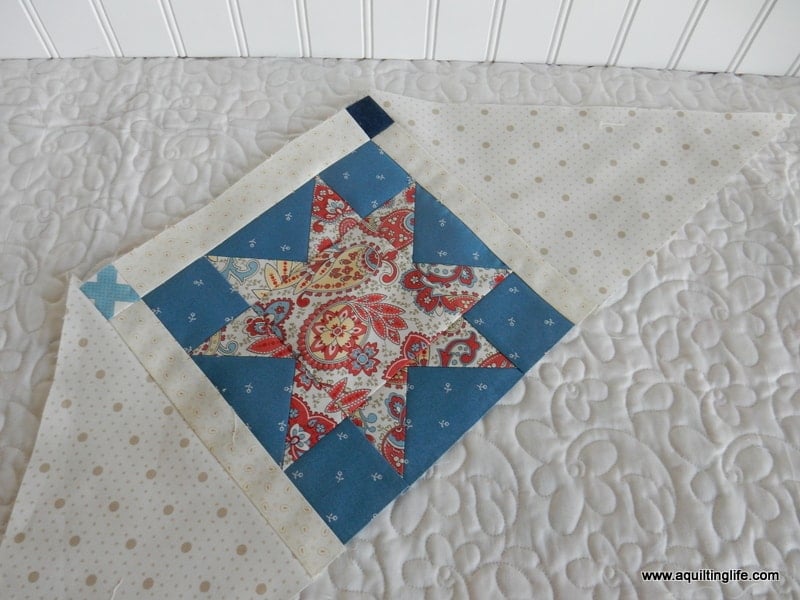
Next you’ll begin to sew the setting triangles to the block/post/sashing strip combinations. Be sure to handle the setting triangles carefully as there is a lot of bias along the long diagonal edge. Again, press the seams toward the sashing strips.
Step Four: Sew Rows with Setting Triangles Together
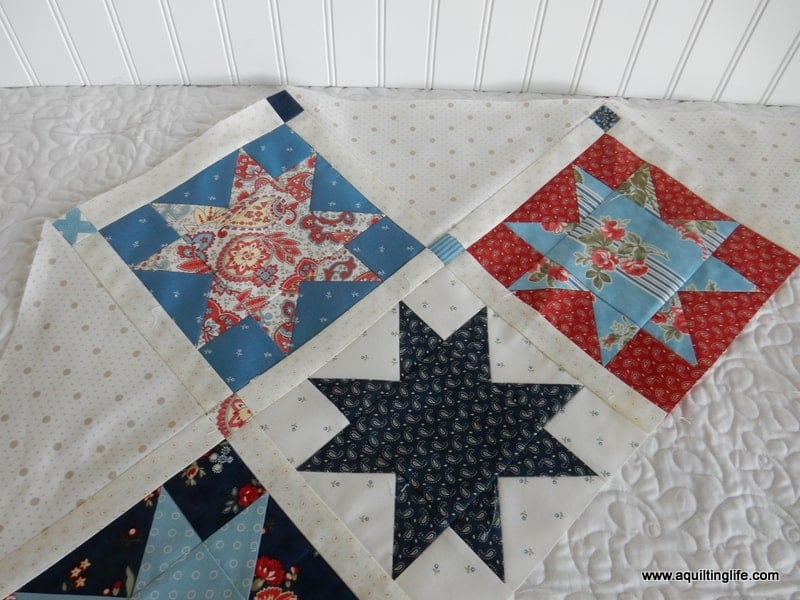
After adding setting triangles to the sides of row 1 and 2, sew these two rows together. Press toward the sashing strip/post rows.
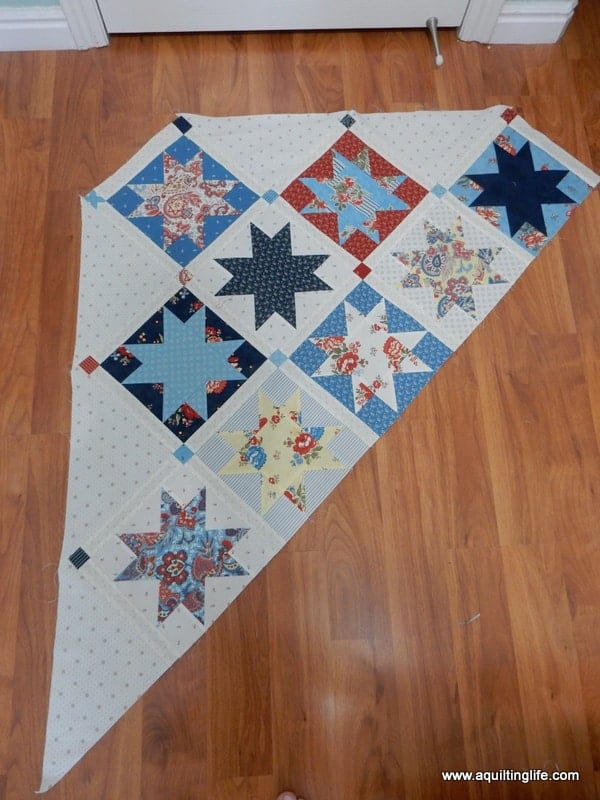
When you add row three to rows 1 & 2, you’ll notice that there is a setting triangle sewn onto the left side but not the right side of the third row (up near the top). This is because one of the corner triangles will be added in that position after the rest of the quilt top is assembled.
(The rows with these differences will be different depending on how many rows there are in the quilt you are making).
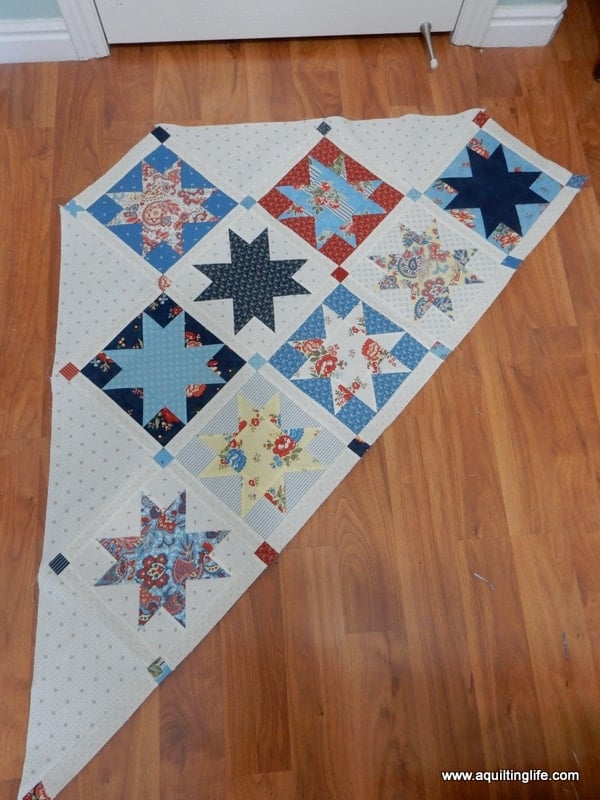
Now you can go ahead and add that “extra” sashing/post strip to the bottom of the top half of the quilt. Press the seam toward the sashing/post strip. Set this part of the quilt aside for now.
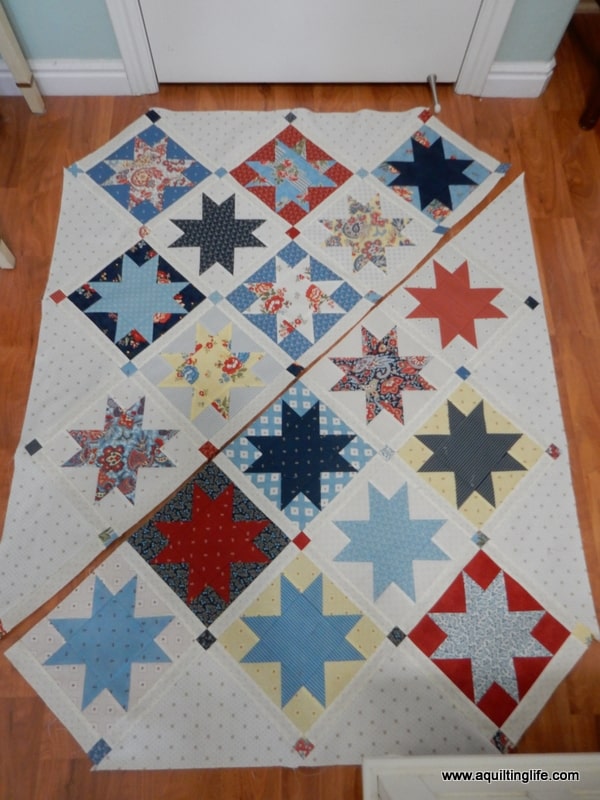
Next, assemble the bottom three rows of the quilt as you did the top rows. The only difference is that the sashing/post rows have been added to the bottom of the blocks. Also, there isn’t a setting triangle to add to the left side of row 4–a corner triangle will be added in this position when the quilt center is completed.
Again, the exact row numbers where the differences occur will be different depending on how many rows are in the quilt.

Finally, add rows 4-6 to the already finished section with rows 1-3. Another benefit of sewing the two halves of the quilt together like this is that you are only sewing with all of the blocks and fabrics one time; this is much easier than continuing to add just one row at a time. Continue to press seams toward the sashing strip/post rows.

Step Five: Add the Corner Triangles
Finally, add the corner triangles to the four outside corners of the quilt. Press these seams out toward the corner triangles.
Sometimes quilt designers purposely over-size the setting and corner triangles. If this is the case with your quilt, you’ll need to trim the quilt. Use a long ruler, and make sure to leave ¼″ past the points of the sashing posts. Then, trim edges evenly. (I use two rulers placed end-to-end in order to make sure I make the cuts accurately).
If the quilt doesn’t need trimming, then you can add the borders as directed in the pattern. Finally, add borders in the same manner as for a straight set quilt.
Watch the Video Tutorial
I hope this tutorial helps with on-point quilt sewing! I also recently filmed a video on YouTube which you can watch here. Also, I’ve included a Pinterest ready photo above so you can easily find this tutorial in the future.
PS. Find the Hometown Quilt Layer Cake pattern here!
Thanks so much for stopping by!


felicia condry says
Love this pattern.
Thank you.
Hildy says
Love your quilt top and the quilting is stunning! Thanks for the tips on point setting looks so good the only thing I'm always struggelin with is the size of the blocks when set on point.
Rhonda Snider says
Is there a way to determine the completed size of an on point quilt if you aren't working from a pattern? I am making 6.5" blocks by sewing three jelly roll strips together. Using the whole jelly roll, I will have 84 6.5" blocks. I can not figure out how large this quilt will be and if it will be large enough for a small child. Thanks for your help. I love reading your blog.
Jan @Cocoa Quilts says
Perfect timing Sherri, I was just looking for my next project last night and saw a few on point quilts. Wasn't sure I was ready to tackle them, but this makes it seem so easy. Just step by step.
Chookyblue...... says
love seeing the whole quilt……….always a slight brain challenge setting on point……
Gayle Miller says
I love on point quilts! It there a formula for figuring out the size for the setting triangles? I know the corner ones are different from the side ones. I have made on point quilts from patterns but never figured out one myself.
shoshu says
thank you,would you consider a post on doing the mathfor setting triangles and corner triangles?
margaret says
thankyou very helpful tutorial
Little Quiltsong says
Thank you for sharing this tutorial, Sherri! I love on-point quilts and keep making a few in between my other regular ones, but I still get so turned around while making them – that I keep saying – "this is my last one" :)!! Visual is great though – and your pics and explanations really help!
Libby says
Thank you for sharing this tutorial. Can't wait to start my quilt !
Yvonne Thomas says
Calculations for the setting and corner triangles are fairly easy. For the setting, take the finished block size (ex 12") and multiply by 1.414. Round that number to the next highest one and add to it 7/8 or .875. That will be the square size you cut for the triangles. You will cut it diagonally both ways to make 4 triangles. For 12" block, the square will be 9 3/8" (9.375). Cut that square into 4 equal parts diagonally (cut an X, basically).
For the corner, take 12" divided by 1.414. Round the number calculated (8.586) to 8.5". Add 7/8" or .875. You will get 9.375". Cut that square into 2 triangles. There is a web page called quiltville.com that gives you info on calculating the triangles plus a cheat sheet that gives you the exact dimensions for finished block sizes ranging from 3" to 16".
Vicdoy says
Thanks, Sherri for the great tutorial. This is my first on point quilt using 10.50" blocks and adding 1.50" sashing strips. How do I determine the size of my blocks when they share a sashing
Teresa Dickenson says
Thank you, Sherri. This is very helpful!
Maria Rose says
Thank you Sherri, really helpful advice . I may even be brave and look to putting the blocks together on point that I am nearly finished making.
Susie says
I truly appreciate this tutorial. It will be my saving grace when attaching sashing onto the blocks of an “on point” quilt I’m making. Thank you.