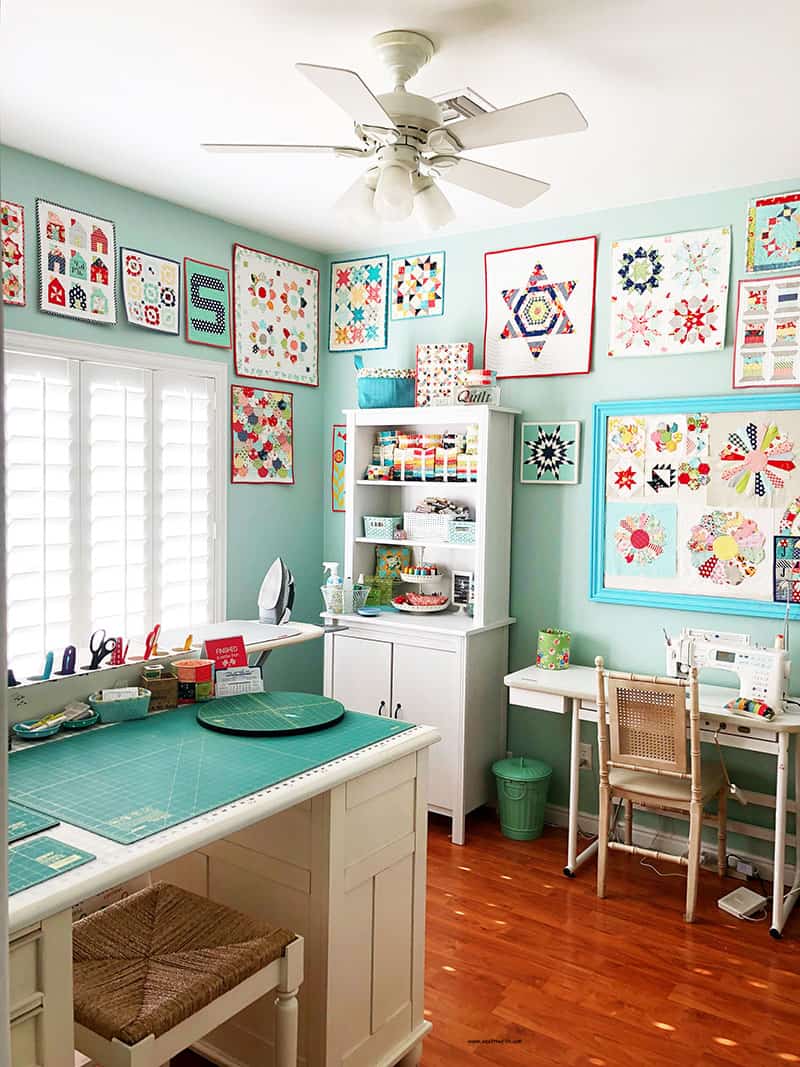
Hello and happy Tuesday! Today I’m sharing something I’ve been trying to finish up for you for a little while! While organizing over the past few months I’ve felt that it would be nice to have a printable check list to mark off my sewing room organization progress. And then I decided to make one to use… and I thought you might find it useful as well. So today I’m sharing 20 Steps to help with your sewing room organization. And I’ve got a printable PDF you can download to help you every step of the way!

Before you Begin your Sewing Room Organization:
- Brainstorm about your space and how you want it to function.
- Prioritize which areas to focus on first (you don’t have to use the suggested order).
- Break projects up into smaller steps if needed.
- Make a time estimate for each step–put on a calendar if needed. Or choose one day each week to tackle one of these projects.
The brainstorming part is actually one of the most useful things you can do before getting started. Think about what currently works for you and what you would like to function better. If you get all of this down on paper it will help you as you plan and organize your space.
I based my list on the Summer Organizing Series I did here on the blog back in 2014. But I made a few changes based on my experiences organizing over the past few months. Scroll to the bottom where each one of my organizing posts from that series is linked. You can then go to those specific posts to get more information on certain topics.
 Helpful Hints for your Sewing Room Organization:
- “Batch” similar tasks. For instance, you might want to tackle books, patterns, and magazines in one sitting.
- Use “time blocking.” Time blocking means that you set aside a certain amount of time for a task on a given day. Turn off your phone and try for minimal interruptions and distractions during this time period. I recently turned off all notifications on my phone for a few days and was amazed at how much more work I was able to get done without those seemingly small distractions.
- When you plan, add 50% extra time to your estimate. This will help make sure you stay on schedule.
- Start with the easiest thing on the list so you can gain momentum.
- Break up projects as needed. For example, you might want to focus on rulers during one time period if you have a lot of specialty rulers.
- Be realistic–an organized sewing space won’t happen overnight.
- Be willing to adjust your timetable as needed. Remember that you want to keep sewing, too!
The PDF printable contains two pages. Page one contains the “before you begin” and the “helpful hints” included in this post. Page two is a checklist including 20 specific steps you can take to work on creating an organized sewing space. Go here to download the PDF printable.
Happy quilting, happy creating an organized sewing space, and thanks so much for stopping by!


 Helpful Hints for your Sewing Room Organization:
Kathleen says
Thank you Sherri, excited to have this new item. Have been steadily making progress in my own sewing space since discovering all your previous organization posts. Nice to have a printed organizing tool now to help keep me on track. 🙂
Jeanna says
Thanks Sherri! I participated in your organizing series in 2014 and had great success with it. I’m now using a different room for sewing and it desperately needs some organizing so this is helpful. Enjoy your 4th!
Cherie says
I need to use all of the steps. Right not my space is a mess. It’s just more fun to sew. You have inspired me to take a few moments and do some organizing.
Jeff says
Thank you for the helpful ideas!
Pamela Forsberg says
Thanks so much this is just what I have been needing.
Brenda Hotinger says
Thanks Sherri! I appreciate all of your organization ideas. Your posts in 2014 were some of the first blog posts I read. Thanks for the list of steps. It will come in handy.
Hildy says
Thank you for all the tips Sherri I will sure use them this summer to declutter my sewing space.
Monica Kostak says
I just printed…my biggest problem as i think about it sitting here at work on lunch- is that i have several bags of left over fabric/scraps from projects i’ve made in the past. (anticipating making something else and keeping all this together-well it hasn’t happened yet)…..I need to get into them bags and sort by color, cut down and put it all in a scrap bins like you have (from a previous article) and by doing this will give me a whole shelf to boot! This will require pressing…cutting..sorting by color and size and i know will be timely. Yep, I have to do this. And i will need to shop for containers. Adding this on my list… Thanks 🙂
Jane Modjeski says
I saved the info from before….I fell in love with the two pedestal desk…..the price coauthor my breaths but but it is a top name manufacturer. I need to sit at it….I think I finally found one a few hours away. If you need another organizing fix my studio is waiting for you!!!! :0)
Audrey Nugent says
I would like to ask about your cutting table. Where is it from? If you built it, how? I love that you have room for a seat to store under it.
Sherri says
I actually bought it a couple of years ago at a little tiny shop in a really small town. But after getting a lot of emails from people, I’ve heard that they used to carry it at RC Willey and some other national chain furniture stores.
The information on the manufacturer is: Klaussner Home Furnishings under their William Mangum Carolina Preserves Collection
Kristi says
Thanks, Sherri! I’m reorganizing my sewing space as we speak!
Dee Winter says
Organizing is a monster I am always trying to do. I recently realized that the original fabric storage plan was just not workable. My area is a catchall storage area, I have a basement that floods so everything had to move up to my sewing area. I printed your pdf, I think it’s going to get the juices moving. Thanks.
Ursula says
I am feeling embarrassed to ask, but I don’t understand the 3 stacks for magazines and patterns – donate, keep and organize. Seems like keep and organize should be together.
Sherri says
Great question. I was thinking that some of them might be fine to put right back on the shelf. But that others (like magazines) might need pages pulled and put in a binder of some kind…thus the three stacks! But you could definitely do just two!