
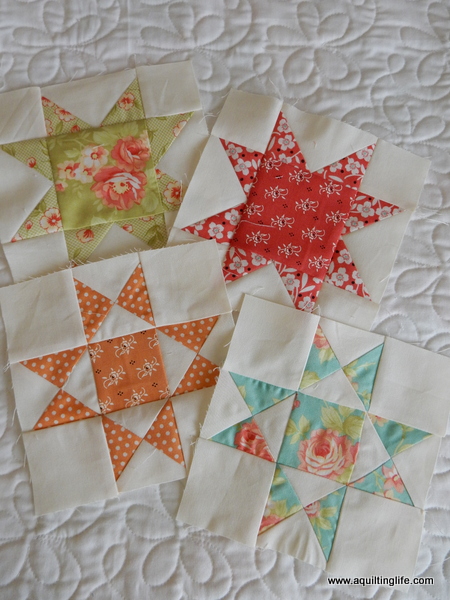
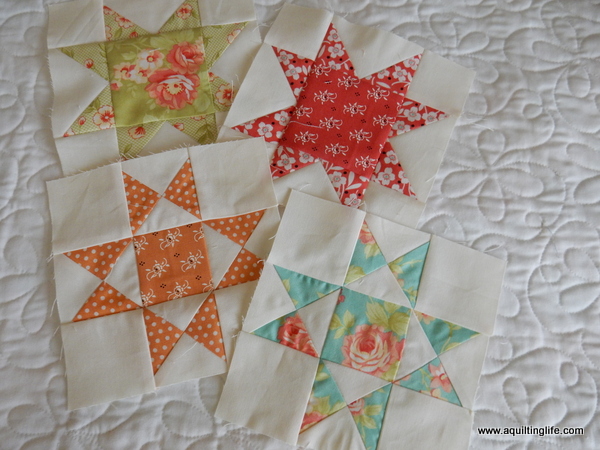
Happy Friday and welcome to the second installment of my Summer Patchwork Sampler Quilt. This week we will be making the Ohio Star block.

I’ve made one of my blocks using a single fabric and used two fabrics for my
second block.
So….here’s what you’ll need to get started…

For one block:
From your background fabric you will need:
- 2 squares 3 ½″ x 3 ½″ for quarter square triangles
- 4 squares 2 ½″ x 2 ½″ for block corners
From your print fabric:
- 1 square 2 ½″ x 2 ½″ for block center
- 2 squares 3 ½″ x 3 ½″ for quarter square triangles
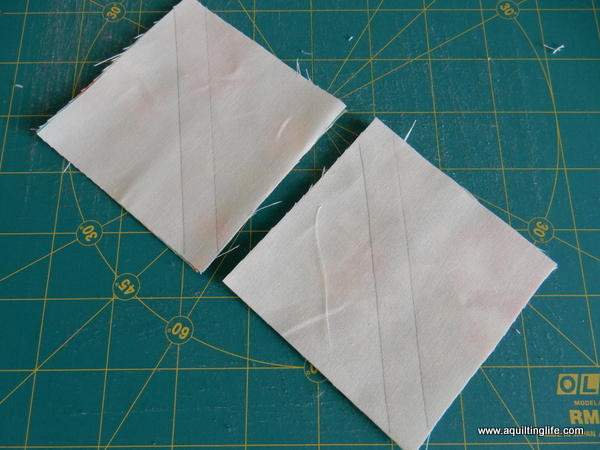
First make the quarter square triangle sections. Place the 3 ½″ x 3 ½″ background squares and the 3 ½″ x 3 ½″ print squares right sides together. Draw a line diagonally across the wrong side of the background squares then sew ¼″ on either side of the line (I’ve just marked my stitching lines above).

After you have stitched on the drawn lines, cut each unit apart on the center line.

You will have four half square triangle units. Press toward the dark fabric, but don’t trim the blocks.
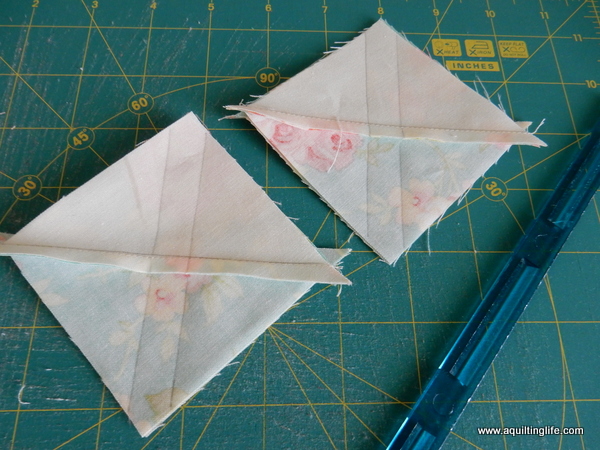
Next you will nest two units together with the seams meeting and dark fabrics on top of light fabrics. Again sew two seams ¼″ on either side of the center. Repeat for the second unit.

Cut apart as before…
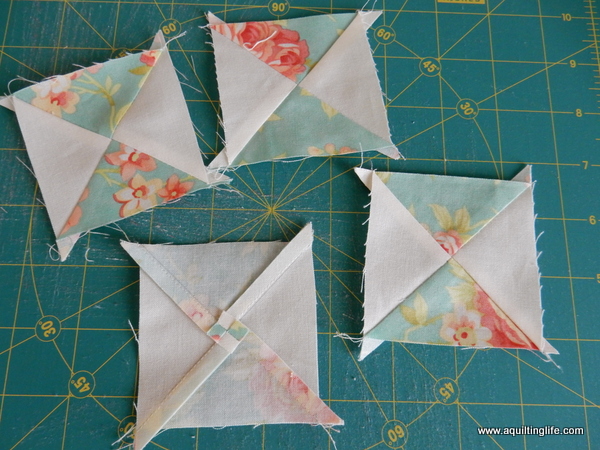
You will now have four units which are all slightly over-sized. Next we will trim the units to the exact size needed for the block.
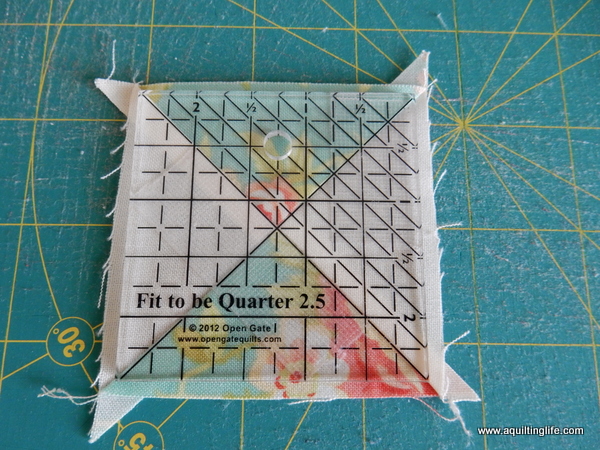
The units will need to measure 2 ½″ x 2 ½″. I have a little ruler I use; however, you don’t need this particular ruler. Any square ruler with a diagonal line will work. Place the diagonal line of the ruler on the diagonal seam, and line up the 1 ¼″ mark with the center of the block. Trim on two sides, then rotate your block and trim the other two sides.
(I have a more detailed post on making quarter square triangle blocks here which you may want to refer to if this is your first time making this unit using this method).

Once you’ve trimmed all four units you are ready to sew the block together.

Sew the blocks in each row together, pressing toward the solid squares in each row.

Then sew the rows together. Your block will measure 6 ½″ x 6 ½″ at this point.

If you are making the 12 block sampler, make another block now.
Hope you are enjoying the sampler block tutorials…if you are here for the first time, you can find the tutorial for the Sawtooth Star blocks here.
I have all of the information ready for the two different settings and will post it in a separate post on Monday. It ended up being too much information to add to this post 🙂
Thanks so much for stopping by!
PS…Craftsy is having another blowout summer sale this weekend with up to 70% off of fabric from now through Sunday evening…go here!

Nancy says
Thanks for these little patterns Sherri. I'm going with a red and green FigTree theme.
Linda Cates says
Thank you for continuing to stay active on your blog and provide such helpful tutorials to us.
Hildy says
Another star block I love:-) Thanks for sharing I'll make it soon because these little blocks are so fun!
Pam @ Quilting Fun says
Beautiful! Thank you for the inspiration.
Jackie says
Love the fabrics! Thank you…
BillieBee (billiemick) says
Great blocks and fabric!
AuntieD says
Thank you so much! These are cute and I'll have mine done this weekend and be ready for Monday. These will be my first quarter square triangles.
trudie says
Finished all four blocks and ready for the next installment! Such fun and sew little time in the making!