
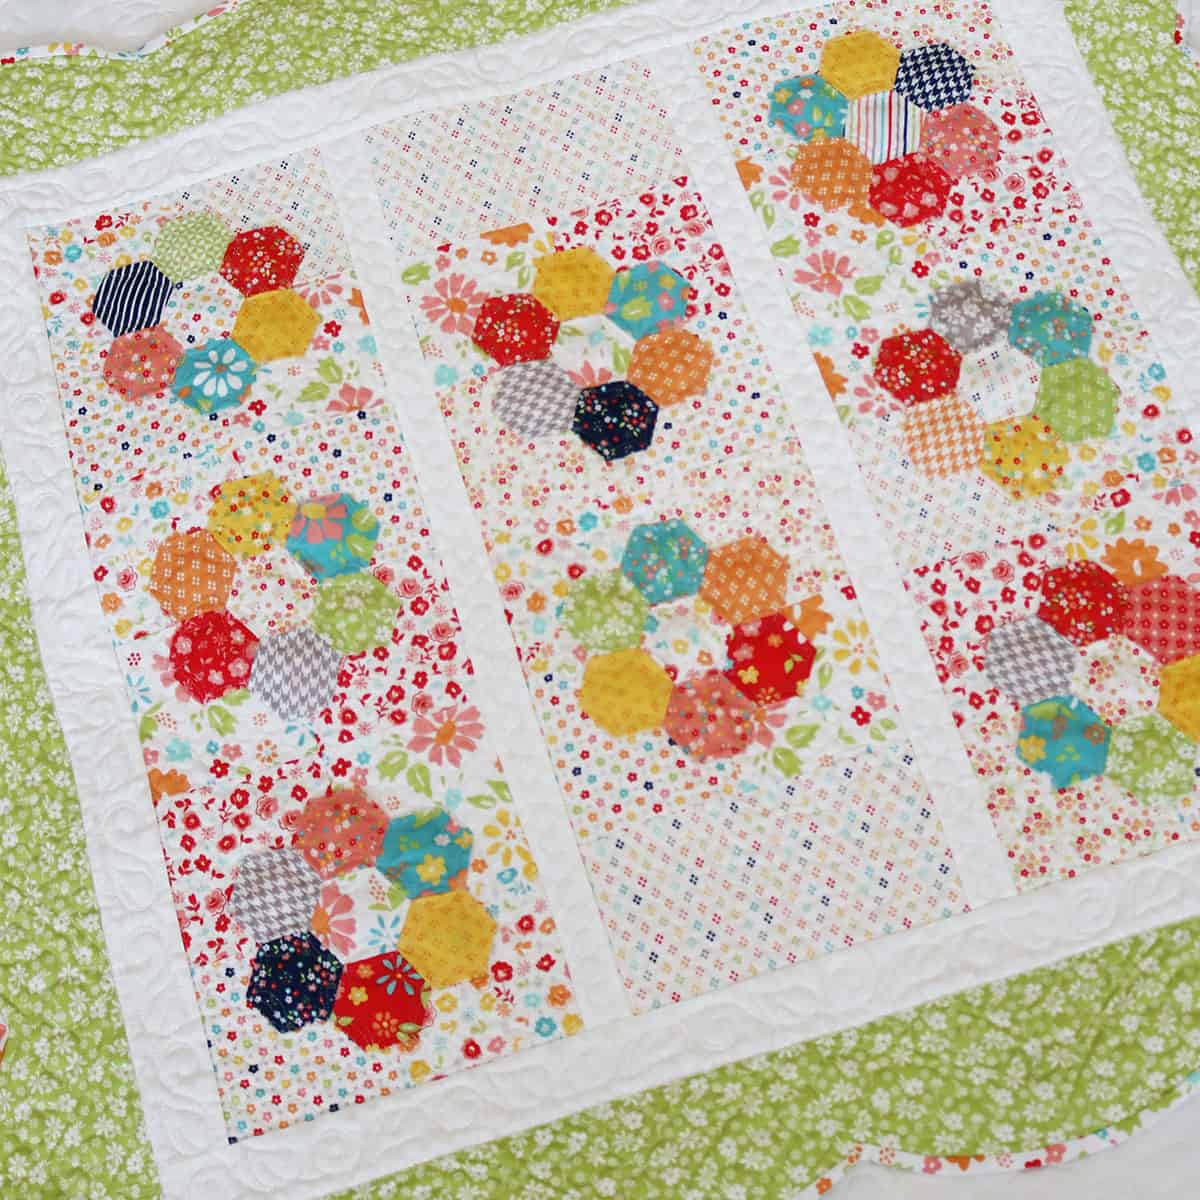
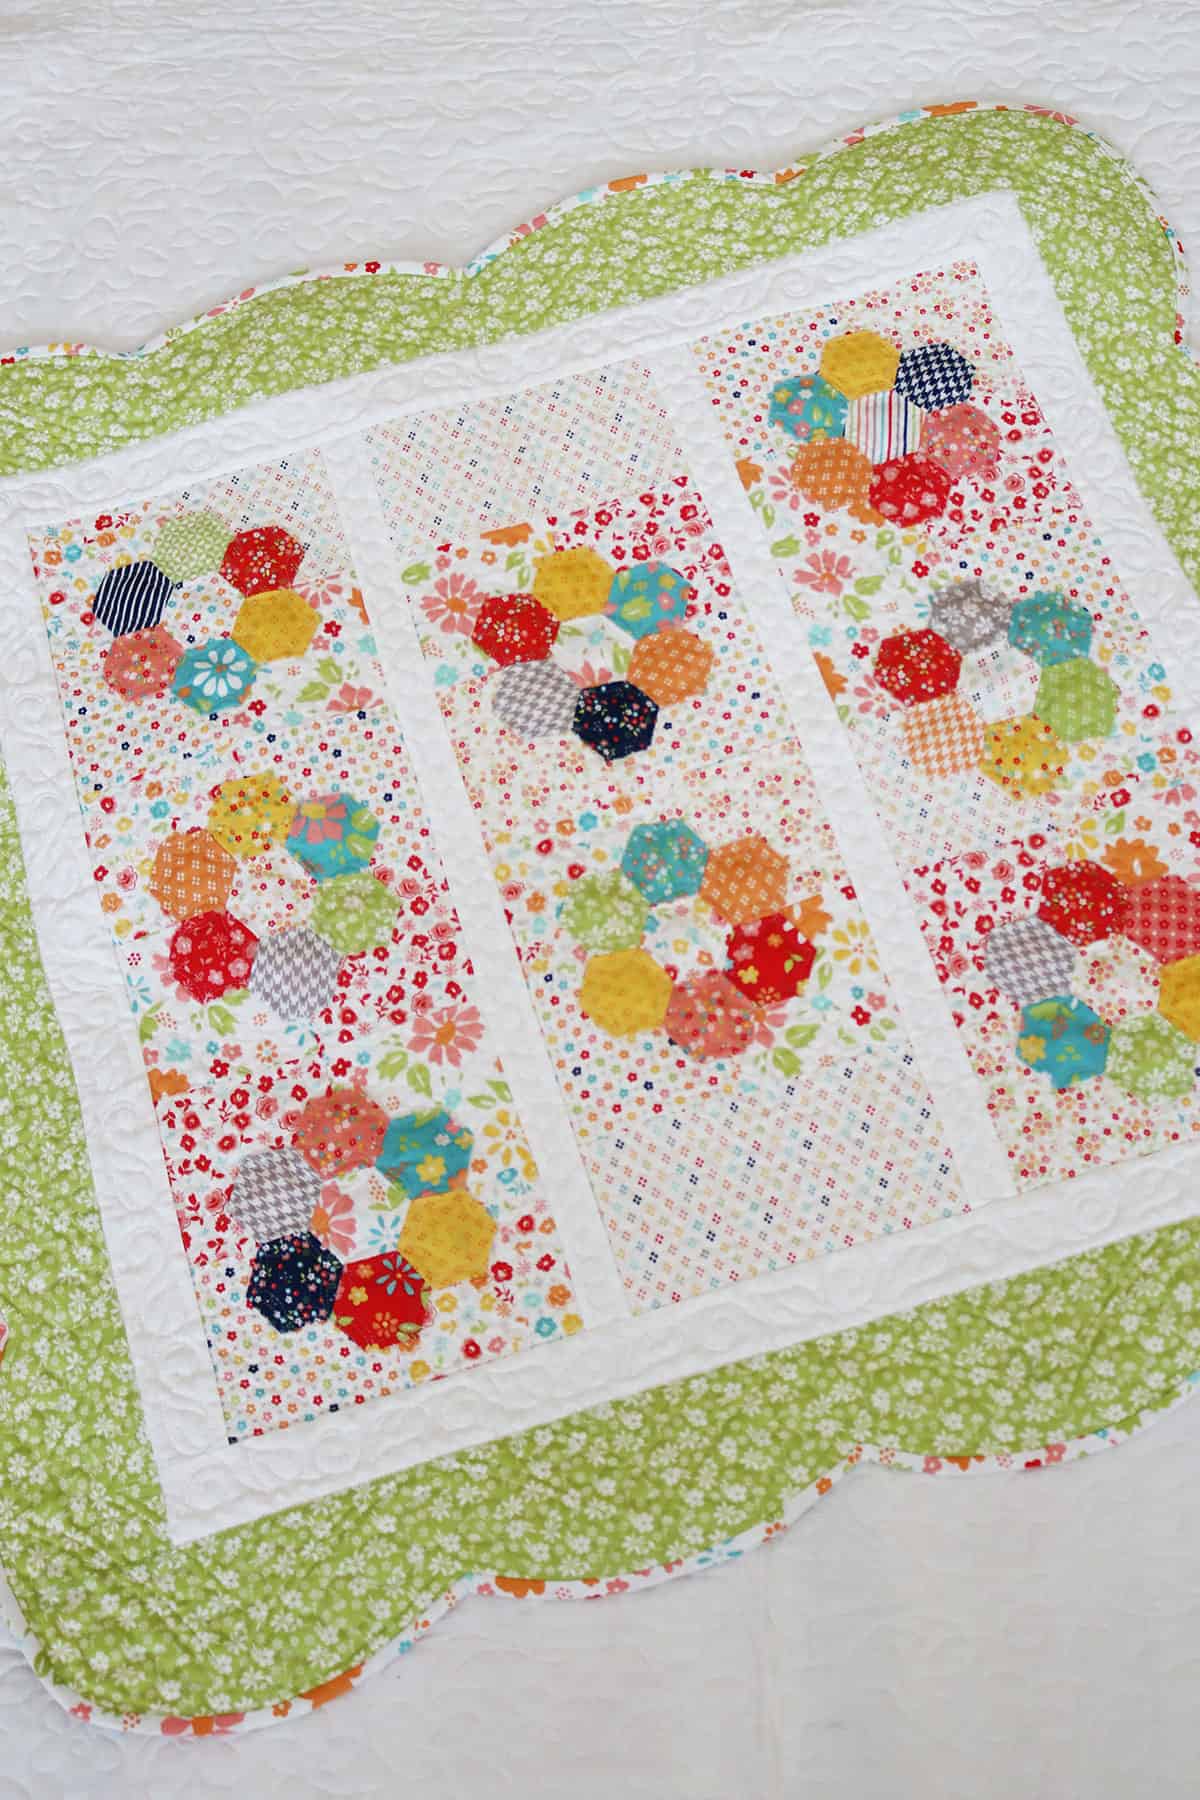
Hello, friends! Today I’m sharing a recent finish along with a Scalloped Quilt Border Tutorial. I recently re-made my Window Box quilt in our Delightfully Yours fabric and decided to add a scalloped border. We filmed a video for this one, and I also have some of the details in this post.
This post may contain affiliate links. If you make a purchase through links on our site, we may earn a commission.
Scalloped Quilt Border Tutorial
Border Details
First, I followed the instructions for my wall hanging but added an inch to the outer border to allow for the scallops. Then, I used this scallop border template and marked the curves for the scallops before sending the quilt to my quilter (the instructions for the “quilt math” for the scallops are easy to follow). I like the look of larger scallops and so chose the largest size I could use in regard to the size of my quilt. I used a 15″ square of fabric to make my bias binding with the strips cut at 1 ¼″. Find some helpful links below and keep reading for the video tutorial details:
Scalloped Quilt Border Video
Watch the scalloped quilt border video above or watch it on our YouTube channel here. I walk you through my initial process including the number and size of scallops I used. You can also see my trimming process after the quilt was quilted.
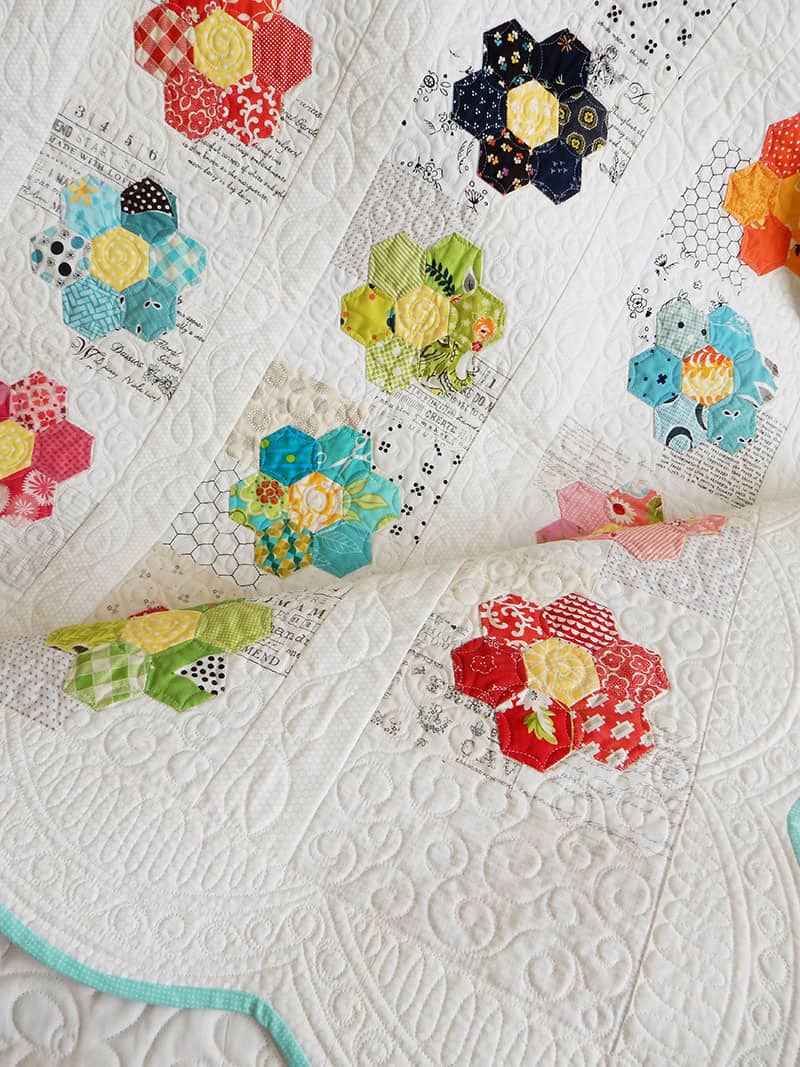
Another Favorite Scalloped Border Quilt
I shared my Flowers for Emma quilt on the scalloped border tutorial video. This is another favorite of mine! It was originally published in American Patchwork & Quilting magazine and is available as a pattern here. This quilt was my first time making scalloped borders on a quilt.
Thanks so much for stopping by for today’s post.
Happy quilting!