After my post the other day I received a few questions about hexagons and specifically the techniques that I use. Hopefully this post will answer most of the questions…and if not, just e-mail me and I’ll try to answer my best! I haven’t really worked on these for quite a while, and when I got to trying to figure out why I realized I just didn’t have any prepped and ready to sew.
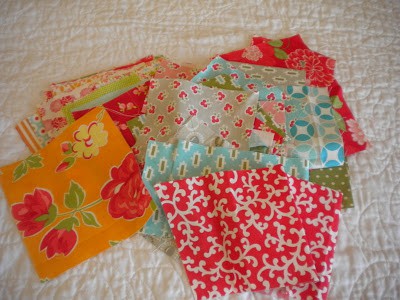
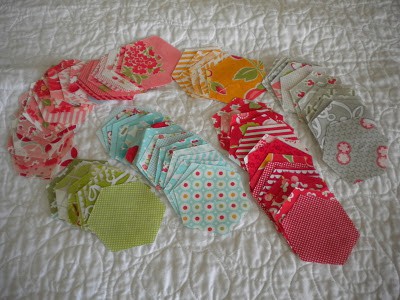
So, I gathered up some scraps (being sure to make sure I had some reds, oranges and yellows, colors I definitely need more of as you can see from the first picture!) and set to work.
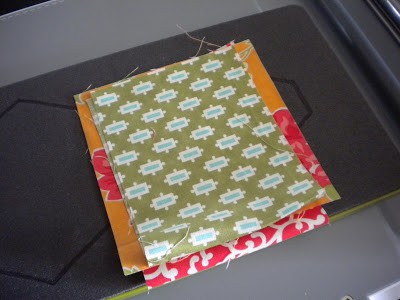
I use the middle hexagon die from my Go! Cutter to cut the shapes for my 1″ hexagons. You don’t have to use a hexagon shape…a scrap of fabric bigger by at least ¼″ on all sides of your hexagon template will do, but I prefer starting with a hexagon shape when possible.
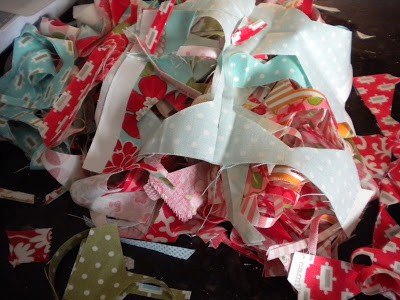
After about 15 minutes of cutting I’m left with just a cute pile of scraps…
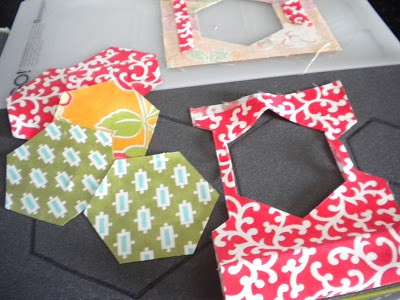
And my newly cut hexagon shapes!
I don’t always do this step, but this time I organized them by color…mostly because I want to work on red, orange and yellow first.
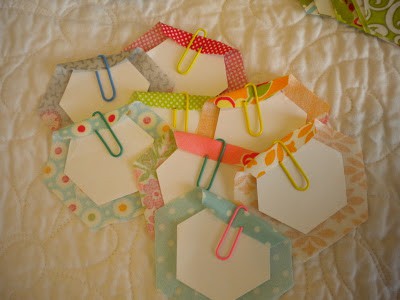
Next, I clip each fabric hexagon to a hexagon template (I love to get my hexagon templates here at paper pieces dot com…they have a large selection of shapes and sizes to choose from. I got the idea to use plastic coated paper clips from Lori.
After just a short time I had a good pile of hexies ready to stitch (less than an hour from start to finish, including the cutting step)! I actually have even more fabric hexagons cut, but I ran out of paper clips!
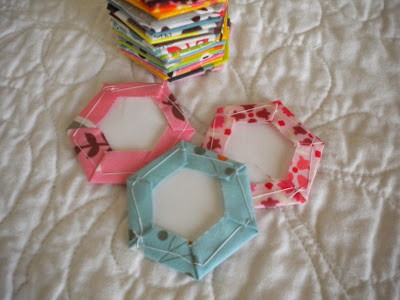
Next is where I do things a little differently from some people. I don’t baste through the paper template. I just bring the corners down and take a slip stitch to hold the fabrics together then take a long running stitch across the top to the next corner. My thread only catches the fabric. I continue to work my way around the hexagon and tie a little knot at the end.
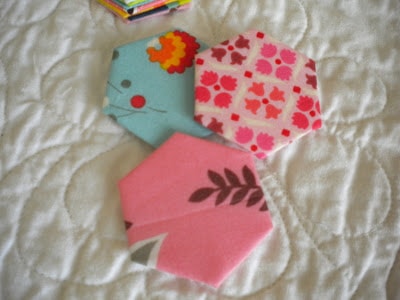
When I’m finished there will be no basting stitches to remove! I leave the paper pieces in until my flower units are sewn together, and then I just pop out the paper pieces and re-use them!
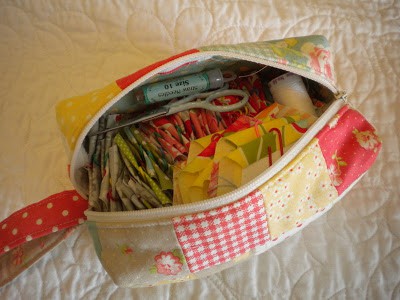
I gathered all of my newly prepared hexagons and packed them in a little zipper bag along with some needles, thread, and a small pair of scissors. Now I can grab this little hexie sewing kit and take it in the car or even just out to the family room to sew while watching television. Since my little tote is fabric I usually end up threading a few needles and pinning them inside the bag so that I am ready to sew!
I’ll be sure to share my progress as I get these stitched up…and I’m definitely going to try to keep my sewing bag full of prepared hexies!
Thanks so much for stopping by!




Gertie Pye says
I heart hexagons too – and these are particularly cute! Love the colours and can't wait to see what they turn into x
KaHolly says
I keep a 'to go box' full of hexies at the ready, too! It's amazing how quickly they accumulate when your riding along, keeping your little fingers busy!
Stephanie says
What a sweet "grab and go" project and bag.
Mommarock says
I do mine quite similar. I just add a paper punch hole in my templates so that I can use a crochet hook to grab the templates out when I finish. It makes pulling the templates super simple. Just stick the crochet hook in the hole, and pull! Simple.
Melody says
I have a 10 hour plane ride coming up and plan to get the hexes out again. I found my bag of large hexes (I buy mine from paperpeices also). I also love Mommarock's suggestion of the hole and crochet hook. Brilliant! And your way of sewing with the tacking stitch at the folds. Much better! Thanks all.
Nance says
OK, I think I could manage that step from your directions. What comes next, how do you sew them together??? How I ask you?!
Darlene says
Playing with hexies is so much fun. It's been forever since I've enjoyed this type of handwork. Maybe it's time to start a project – we'll see. 🙂 Great tutorial, Sherri.
Be still my heart – there's one of your cute zippered bags. 😉 I need to do a barter with you or offer dollars. LOL
Lori Holt says
Hi Sherri…thanks for sharing my method for doing hexies!!!! I'm glad that you like it!
Lori
Rebecca says
Ohhhh..I love that trick with theslip stitch in the corners…
Gotta give it a try!
Needled Mom says
Great idea and ready to grab and go!
s2br11 says
Just wondering if we could cut the smaller GO Hexie for the paper pieces??? Thanks for the tips on stitching them without having to take out the basting stitches! COOL. Also, I like the comment about the hole punch to help remove. Sweet! I love your blog. I get so many ideas!
Mary Malone
Kathy MacKie says
Definitely going to look for those plastic coated paper clips, thanks for the great idea.
Mama Pea says
I always love seeing other people's processes! Thanks!
suemac says
I have never tried doing hexie's. Maybe that will be a hand sewing project for next year. I like that you precut in the hexie shape. All I need to do now is get a hexie die for my Accu-Quilt Go Baby.
Michelle Jensen says
Okay, thanks for the advice. I have been really really wanting to try some Hexies and I keep putting it off. It just seems hard with Y seams. I look forward to seeing what you make from all those. Hey, I wanted to say that I am from Utah too but I am out in the sticks in the little town of Tooele 😉 I think that we have some of the best quilters from this little state, lol. Thanks again.
merumo says
Pretties are all nesttled in the box pouch! I made whole bunch of hexagons a couple of years ago and they are still there as I can't decide how I want putting them together yet. lol But I guess I can still keep making them without any plan? Your fabrics are so inviting…
Anne Heidi says
Your hexagons look so cute, and what a great way to prep them 🙂 I'll have to see if I have that die for the Go! cutter…
Toni Stone says
I love the idea of paperclips and not going through the paper when basting. I have tried the hexagons and put it up and now I am ready to finish. Thanks for the info.
trish says
Your hexies are too cute. I like the method you shared and especially how you were able to precut your fabric in that shape. :0) Thanks for a fantastic tutorial. :0) By the way .. super cute bag. I need to keep my things separate and never thought to make different bags. I know what one of my next projects will be. :0)
Patti says
I love your hexies too and your tutorial about how to do them. Thank you so very much – now I know what I need to buy. Not much – paperclips, cut hexies from the States and the hexagon die for my Baby Go!
Love
Patti xxx
Kathleen says
love your hexies…I have the GO BABY and want to make the hexies…so you purchased the 1" plastic pieces since your hexies are 1"….just want to make sure that I order the correct size for the plastic pieces….thank you..
MaterialGirlQuilts says
Love the colors of your hexies and thanks for the great tips.
Amanda
Bari Jo says
I love the bag that you put them in – I think I remember you blogging about them ages ago …I need to search to see if I can find the pattern – I would like to do the same… I have a tip for you that I read some place a while back – I do my hexagons the same as you do – the only difference is I use a hole punch and punch a little hole in the center of each template before I start – it makes it really easy to remove it after the flowers are all sewn together, etc. Just insert the tip of anything really (or a hemostat) to pop it out of there…. I also have lightly starched them once they are basted but before I sew them together (hexagon to hexagon) – they stay crisp when the papers are removed when the flowers are stitched. Thanks for all you share – I learn so much from you! :o)
Jan says
Thanks for sharing your way of doing hexagons–it is a great way to do them. I especially like the idea of not sewing through the paper. I wish I had seen your way before I did my hexagon project!!!
Carla says
I love hexagons too! You project will be lovely
Carrie P. says
I used to do my hexies a different way until I saw Lori's tutorial, now that is the way I do mine.
Dana says
This is the method I'm using and I love it too! I have my little box of hexie supplies always ready. One thing I do that you might want to try is to punch a hole near the center of the paper hexes. Then, when I'm ready to remove the paper, I can use a seam ripper or other narrow object to grab them and quickly pop them out. I do this at the ironing board while I'm pressing my finished pieces. If the papers are creased, I just hit them with the iron and they are flat and ready to go.
Kathy H says
I am just starting to learn how to make those hexes. I had been taught to go through the paper which seemed like more work to remove the paper later. So I am glad to see you just basted the fabric and how beautiful they came out.
PamKittyMorning says
I don't go through the paper either. I don't know how that got started but I hope by now everyone gets the memo you don't need to do that. You're always so busy, I need to take a leaf out of your book as my mom would say.
Richardson says
Hi:
I just came across your blog, and fell in love. I just wanted to know why the paper clips? I went to Lori's blog and couldn't find the answer anywhere.
Hugs,
Vicki
sunraesban@yahoo.com
Laura G says
Hi, I was wondering if you can tell me what sized Hexi paper pieces you buy. I do not want to go too small or too big. I am like Goldilocks and I want it just right Thanks for the Tut!
Siobhán says
Oh my gosh, I can't wait to see more as you work on your hexies! I just love that Marmalade line. I love the idea of the paper clips! I have one of those big clips that are for a lot of paper and I use that as I start off basting and then remove it once I've basted a few sides.