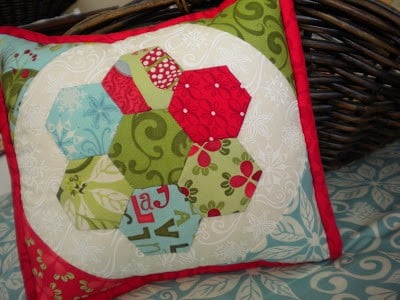
Some of my favorite simple gifts to give are small pillows. To see a couple of the pillows I made last Christmas go here. This year I have plans to make a few fun pillows using 12 Days of Christmas. I thought you might like a tutorial on how to make this pillow…so here goes!
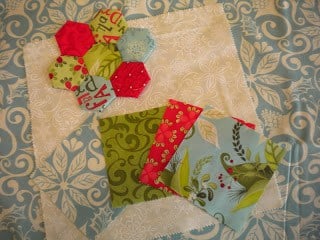
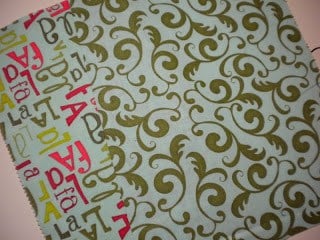
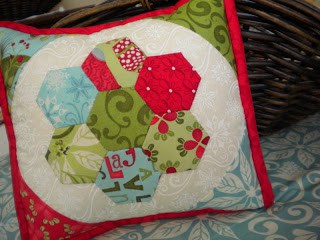
I used one background layer cake square trimmed to 9″ square along with 4 charm squares trimmed to 4″ square. I made my hexagon flower using 1″ paper pieces and scraps.
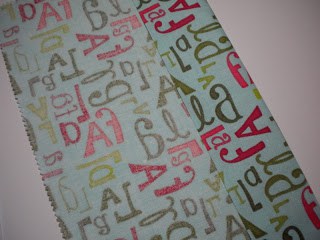
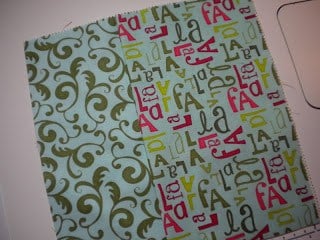
You will also need two other layer cake squares for the backing. Trim them one to 8″ by 9″ and trim the other to 7″ by 9.” I also used one strip of 2 ¼″ by width of fabric for the binding (not pictured).
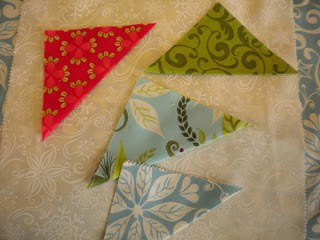
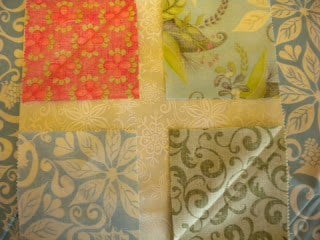
Press the four inch squares wrong sides together to make triangles like this.
Then sew each square, right sides together, to the background square. If you enlarge the photo you should be able to see that I used the pressed line for my guide, sewing just a thread inside the pressed line.
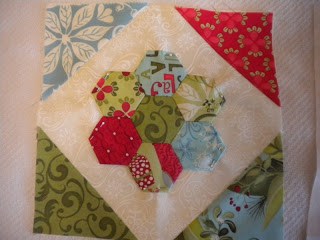
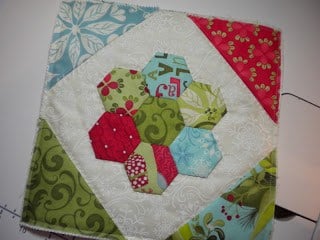
Press the squares out to the corners and you’ll have a triangle on each corner. I trimmed the extra fabric ¼″ away from my seam. At this time I pinned my hexagon flower to the background fabric, centered it and stitched it to my pillow top. If you want to do some handquilting you can do that now…but you don’t have to. I added a layer of batting and did a simple outline stitch around my hexagon flower and along the edges of the corner triangles.
On the larger backing piece press under 1 ½″ on one side. I also did a narrow hem (you can use a zig zag stitch or serge this edge also) on the edge of the side that was folded in (the hem doesn’t show in this photo).
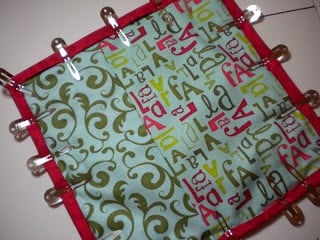
Next pin your backing pieces to the front of your pillow–wrong sides together. Make sure the backing piece with the folded under edge is on top. You will be able to insert your pillow form through the opening between the two backing pieces.
Stitch around all edges using a scant ¼″ seam.
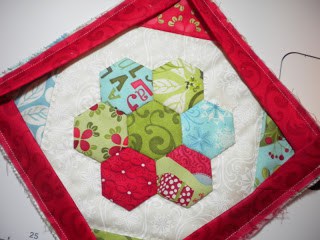
Attach your binding to the front of your pillow. I’d actually never seen a pillow constructed using binding until very recently when I saw pillows with binding on this blog and absolutely loved the idea. I think I’ll be adding binding to many of my pillows now!
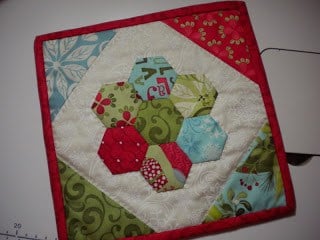
Hand stitch the binding to the back…
You’re just about done. Actually, this little pattern would make a really cute potholder too…I made my own pillow form to stuff inside. The good thing about using this method is you can swap out pillow covers according to the holiday!
And there it is…a fun pillow perfect for gift giving! Instead of a hexagon flower a bit of stitchery in the center of this pillow would be really fun as well. Even easier would be to just make your favorite 6″ block using Christams fabrics and add a 2″ border all around…there are so many ways to make and embellish pillows…and you might need to make two so you can keep one for yourself! Have a wonderful day!


Becky says
That's adorable. I really need to do some of these hexagons I see everywhere. They are so cute. Love this christmas one.
mariaerba says
thank you so much…
i love this project 😉
ciao Maria
Italia
Carol says
Wow, I love your pillow. Thanks for the info on how to make it.
Darlene says
Very, very cute, Sherri. Carrie aka Miss Rosie showed some pillows on her blog a while back with binding on the edges – give the pillow some stability (I think)
Your gift recepients are going to be happy, happy to receive all the sweet treats you're making.
Peg - Happy In Quilting says
Love the bind on the pillow great idea…looks fantastic thanks Sherri..
Loris says
Very cute and festive! Love the fabrics and the binding idea. Nice work!
Material Mary says
Sherri, I love how you showed the corner triangles. I have never done it that way and it is a great tip. Thanks for sharing.
Mary
Carol says
Very, very cute Sherri! The recipients will be doing the dance!
Sinta Renee says
Great project Sherri what a sweet holiday pillow and what a woderful gift to give!
Glenna @ Hollyhock Quilts says
I love this! So cute and simple, but very effective. Thanks so much!
Just Ramblin' says
Your little pillow is adorable and looks easy to do. Can't wait to try it. Nola
Carrie P. says
Sweet!
Linda says
Love that project! Looks pretty quick and simple too!
Stephanie says
Cute and I love the binding on the pillow.
Quilt Hollow says
Sweet and cute project!!
Dana says
Thanks for giving the instructions for this darling pillow!
Jackie says
Really cute! How did you make your own pillow form?
Nedra says
Great tut! I am looking for ways to use my hexagons, and I love the idea of putting a flower in the middle of a pillow.
KaHolly says
A wonderful way to use those hexies!! And such a sweet idea. You're so clever!~kaholly
sewmeow says
Great tute…thanks for the ideas. I just wanted to wish you a wonderful Happy Thanksgiving to you and your family. I love this time of year and we have sew much to be thankful for.
I enjoy your blog.
Jeni says
I LOVE this. I am so doing it. I have the exact fabric and also wanted to use hexagons but didn't know really what to do…this is my answer. Thanks for showing how easy it is to do the back too.
Happy Thanksgiving!
Madame Samm says
nothing simple about this…as always perfect.
Magnolia Bay Quilts says
That's the sweetest little pillow! I've already picked out fabrics in my head! Thanks so much for sharing the tutorial.
Silk says
Thanks for the tuto! I love this proyect is a great idea!
Silk
Brenda says
Very cute pillow. I love that fabric line.
Mama Pea says
How cute. I love cute little pillows. How come I never think of them for little gifts? Thanks for bringing that to the forefront. 🙂
Suzie says
Thank you for this lovely idea!
Stray Stitches says
Thanks for the great tutorial!
Terriaw says
I adore this project, so I am thankful you shared the instructions with us! It's a perfect simple project for a gift. And you chose the perfect fabrics for this. Now I'm inspired to finally cut into my 12 Days stash.
julia says
what a beautiful little pillows…i see that you're still a fan of hexagons 🙂
xoxo,
julia
Mary on Lake Pulaski says
It's adorable Sherri! Another little gift I can make out of things I already have! Thank you.
Nanette Merrill and daughters says
So cute and such a good idea.