I have a fun tutorial for you today…but first I want to let you know about some absolutely gorgeous Bella solids bundles Joanna has put together. If you haven’t read her post yet this morning, you’ll definitely want to stop by for a look.
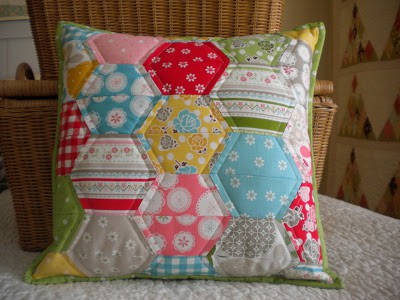
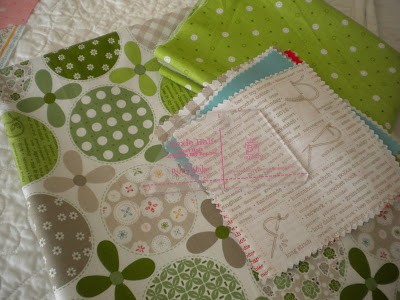
My friend Lori sent me one of her new Half-hexie ruler sets and some Polka Dot Stitches to play with! I’d been wanting to make a hexagon pillow for quite a while, so this was the perfect opportunity to have some fun with an easy to construct method for hexagons.
You will need 20 5” x 5” charm squares, ¼ yard for binding, ½ yard for backing, and Lori’s Half-Hexie ruler, of course! I’m using the smaller ruler (sized for charm squares) for my pillow; however, the set also comes with a larger ruler sized perfectly for use with layer cakes!
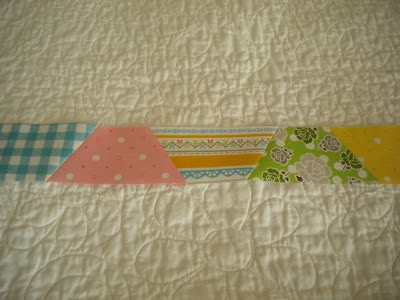
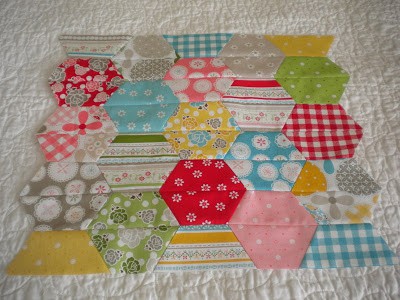
Cut 2 half-hexagons from each charm square. You’ll end up with a total of 40 half hexies. Arrange the hexagons in 8 rows of 5 half-hexies each. Play around with the arrangement until you are happy with the distribution of prints and colors.
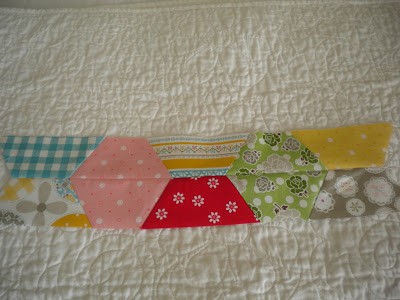
Begin sewing the rows together. The sewing will be regular straight seams…no y-seams required! I pressed each row in one direction, alternating the directions so the seams would “nest” when I sewed each row together.
After all the rows are sewn, begin sewing the rows together. I actually pressed these seams between the rows open.
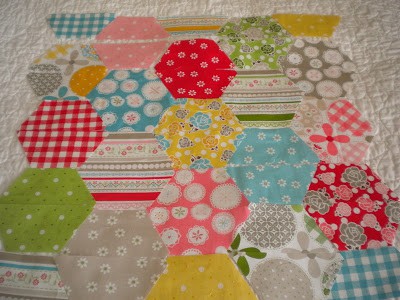
After you’ve sewn all 8 rows together your pillow top will look like this. It’s starting to come together!
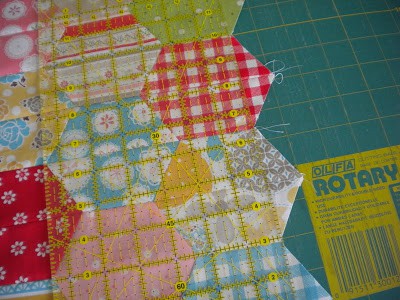
Next you’ll want to use a long acryllic ruler and trim the side edges straight. I lined up the ruler edge with the innermost points of the hexagons.
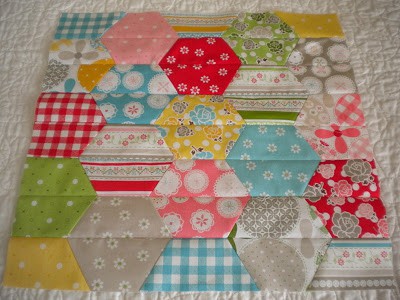
After you’ve trimmed the sides your pillow top will measure approximately 15” x 15” and will look like this. You can put your pillow together now, or you can do a little hand or machine quilting on the front. I layered my pillow top, a piece of batting, and a piece of muslin and then machine quilted ¼” on either side of the hexagon side seams, starting at the center top of my pillow and sewing down to the bottom, pivoting at each point.
Unfortunately, I didn’t take a picture of the quilting, but you can see it in the finished pillow pictures.
I wanted a zipper back for my pillow and used this Sew, Mama, Sew! tutorial found here. Here are the measurements I used for my pillow back sections if you are using this tutorial (the directions in the tutorial are for a pillow of a different size). Note: I made my pillow back ½” bigger than my pillow front and trimmed everything up even after sewing the back to the front.
- Cut one piece 4” x 15 ½” for back flap
- Cut two pieces 8” x 15 ½” for pillow back sections
- Use a 16” zipper. I like to use a larger zipper and cut it off, giving me extra room to work with.
If you don’t want a zipper back, finish the pillow as desired.
After making my pillow back, I placed my pillow top and pillow back wrong sides together and sewed with a ¼” seam all the way around the pillow.
For binding I used 2 strips of fabric 2 ¼” by the width of the fabric. After binding, insert a pillow form (I used a 14” x 14” pillow form), and enjoy your pillow!
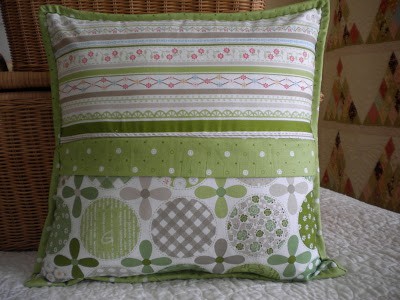
Here is a picture of the pillow back–I actually used two separate fabrics for the pillow back sections and a third fabric for the flap.
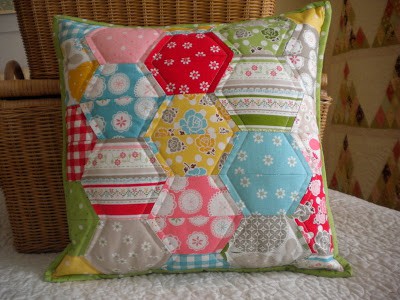
And here it is! I think it would be a lot of fun to have a pillow parade here on my blog next month! If you make a pillow using my tutorial, send me a photo, and I’ll post a parade on March 22nd (of course we’ll have to have prizes for the parade as well)!
The Half-Hexie Ruler Sets are available now here at Fat Quarter Shop!
Thanks so much for stopping by!


Elaine M says
Cute and my kind of construction!
Anita says
Love your pillow! I couldn't tell they were half hexies until you went through the process 🙂
Gertie Pye says
Beautiful! The quilting really finishes it so nicely. And the back is as lovely as the front!
Grandmasewnsew says
I love this! The look of hexi with the ease of an easily sewn block! Great idea!
Stephanie says
The easy way is the only way I'll ever make a hexagon. I tore this method out of a quilt magazine a few years ago. It's in my "one day" pile of projects. Very pretty pillow.
my Haven says
Oh, what a nice pillow. Think I will have to make one for myself;)
carla says
Hi!!! Thanks for the tutorial!!! Yours is very pretty!!!
Tessa says
I love it! So cute
Marla's Crafts says
That is so cute. That definately is on my to do list. Love the material on the back.
Sinta Renee says
That is a cute little pillow. Thanks for the tutorial for making it. Sweet!
Mary on Lake Pulaski says
What a cute little pillow! Great rulers by Lori!
muhammad ibraheem says
Investment Plans to make money online, Online Jobs can make money online from home, Just Visit
http://www.jobzcorner.com
Carol says
Very, Very cute! Love it!
Darlene says
Great tutorial, Sherri. Lori's rulers are on my must have list.
Lori Holt says
Thanks sew much for doing this tutorial Sherri!…I love how your hexie pillow turned out and your pillow parade sounds fun:)
Nicole says
The Hexagon pillow looks great!
Nanette Merrill says
Those half hexies of Lori are pretty slick! Love the pillow.
Quilt Fabric Pizazz says
How cute is that pillow! Very cute indeed! And…..even better, so easy to make. Thanks!
Mama Pea says
I have a half hexie ruler….not sure if it is the same one, but it is fun. I love your pillow!
praveen kumar says
wow nice